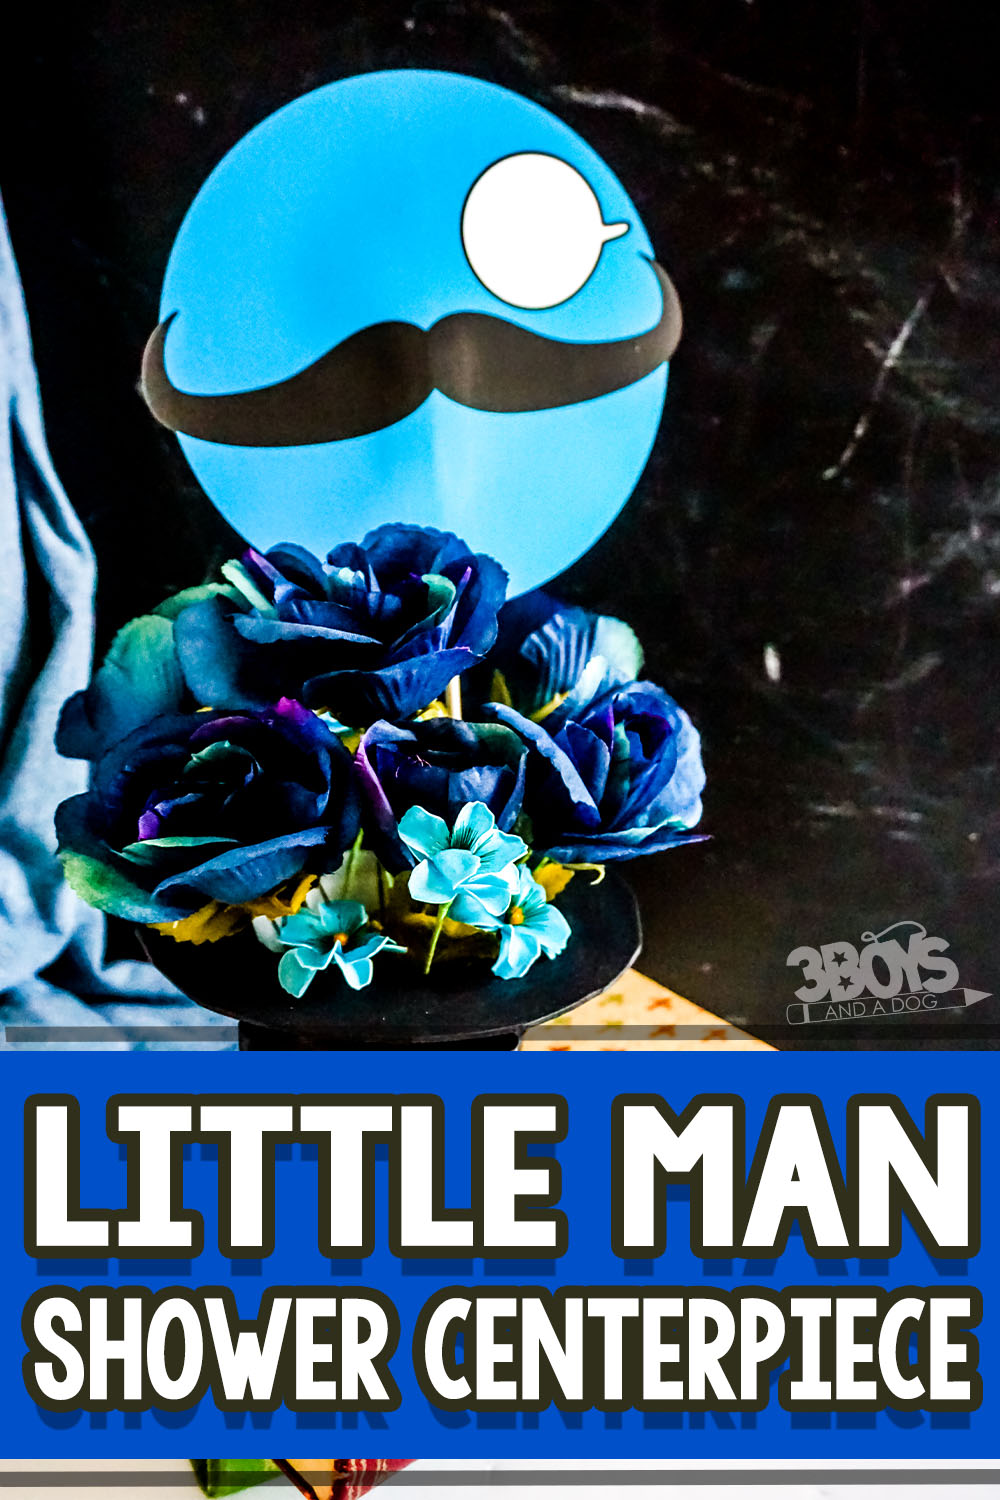
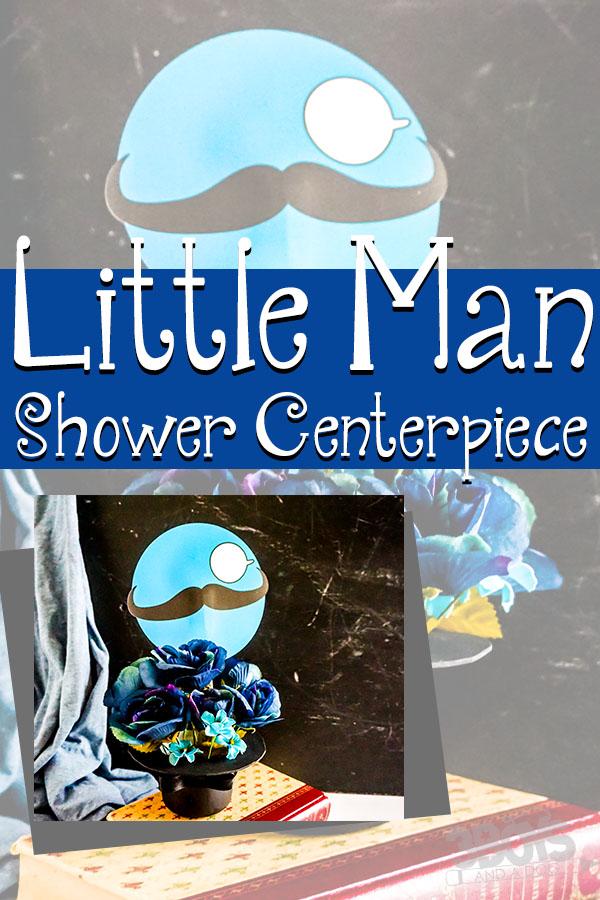
Little Man Baby Shower Centerpieces


If you’re planning a welcome party for a dapper dude, these little man baby shower centerpieces are the easiest, most fun DIY shower crafts of all!
Check out the rest of my baby shower ideas for boys that you’ll love!
Oh, and make sure you check out the full set of little man baby shower decorations here so you can put a mustache on everything. We all like a well-put-together party, monocle and all!
With those in your waistcoat pocket, let’s get back to these little man party centerpieces for the baby shower. They’re insanely quick to pull together, taking a surprisingly few and frugal set of supplies.
And who doesn’t want a little man mustache party for your baby shower theme or even a lil man 1st birthday?! Let’s shower little man with love!
✨ June only
Earn this for FREE!
Host a Pampered Chef party this month and unlock up to $230 in free products — including double rewards. Message me and I’ll show you exactly how easy it is!
💬 Message me on FacebookTerms and conditions apply. June offer only.

Necessary Materials:
I rummaged around in my craft supplies – and the recycle bin to make this boy’s baby shower or tiny man’s birthday party centerpiece. But you could find similar things in the craft store or dollar store, I’m sure.
Just to be helpful, though, I pulled a few affiliate links for you, just to give you an idea of what you need – and what I mean.
- Single-Serve Potato Carton (honestly, this is the perfect shape and CHEAP!)
- Black Acrylic Paint
- Black Craft Foam
- Black Ribbon
- Floral Foam
- Blue Faux Flowers
- Printable Little Man Decoration
Necessary Tools:
Making a DIY centerpiece for a dapper baby shower idea can be as simple or as complex as you enjoy crafting it. I tried not to go too over the top, but this particular baby shower theme is kind of naturally “over the top” so there’s that.
But to get the basics for this decoration for a little man shower, here’s what you’re going to need:
- Paintbrush
- Craft Knife or Stout Scissors
- 4-inch Circle Form (like a bowl)
- Pencil
- Hot Glue Gun and Glue
Would you like to save this?
That should be all that’s necessary unless you want to make baby shower favors or baby shower invitations – which are a whole ‘nother story, but let’s go through some tips and tricks to customize this centerpiece.
Tips and Tricks:
One of my favorite DIY party decorations, this top hat centerpiece is a great way to mark tables, distribute shower games or just add to the overall theme. But these tricks are going to help you make your centerpieces your very own.
- When you go to make your initial cut on the craft foam to make the brim of the hat, try to be smooth with your movements. But, keep in mind that you can trim and adjust – it’s a very forgiving material. You can also use sandpaper to smooth out any bits that might just not be working for you. Craft foam is fun like that.
- If you would like to make your centerpieces two-sided, you can just glue two of the big round blue face shapes back-to-back on either side of the dowel. That one extra step will open-up the back of the centerpiece in one motion!
- I know not every baby shower baby decoration has to have a bunch of flowers. But this one just called for it. If you’d rather not do faux flowers, though, you could do rolled washcloth roses, baby binkies or some other element in the top hat. You could even fill the hat with a party favor for guests!

What Do You Do With Dapper Themed Baby Shower Centerpieces
Put your monocle on and let’s get down to business: What exactly do you DO with these baby shower dapper boy centerpieces?! The answer is easy! You use these centerpieces to set the mellow little man tone for your whole baby shower.
Place the centerpieces on each table for basic decor, add a note in one centerpiece to designate a table for gifts, use this centerpiece as a topper for a diaper cake or a focal point for your cupcake and snack table.

Other Baby Shower Decoration Ideas:
- These easy to make jungle shower decorations are perfect for welcoming home the newest king of the jungle!
- Baseball baby shower decorations are made SO EASY by just grabbing this quick download then printing and cutting on your Cricut!
- There’s nothing cuter than these adorable (and gender-neutral) owl baby shower decorations.
- Adorable and fun to make, these unicorn baby shower decorations are definitely magical and sparkly!

Little Man Baby Shower Centerpieces
Equipment
- Paintbrush
- Craft Knife or Stout Scissors
- 4-inch Circle Form (like a bowl)
- Pencil
- Hot Glue Gun and Glue
Materials
- Single-Serve Potato Carton
- Black Acrylic Paint
- Black Craft Foam
- 1- Inch(es) Black Ribbon
- Floral Foam
- Blue Faux Flowers
- Printable Little Man Decoration
- 1/4- Inch(es) diameter 10-inch long Dowel
Instructions
- Start by emptying and cleaning your potato carton. Any carton with the general shape will do, but this was in the cabinet so it was the perfect thing to craft with. Once clean and dry, peel the label off and remove any residue.
- Place the circle form onto your craft foam, tracing the shape of the form onto the craft foam with the pencil. Cut out the circle shape from the craft foam.
- Hot glue the open-side of the potato container to the circle of craft foam, centering it neatly.
- Paint the potato container with the black acrylic paint. Allow the paint to dry completely. If you need a second coat, now is the time to do so. Please note that the paint will easily scratch off. If you think that the hat may be roughly handled, you can take this time to add a coat or two of craft sealant. Just make sure it is dry before continuing.
- Flip the hat over and cut the center out of the craft foam.
- Fill the hat with floral foam, followed by adding the flowers.
- Wrap the ribbon around the hat and tie it in a bow, to cover any hot glue visible where the brim hat and the hat body come together.
- Download the little man baby shower decoration large circle file and upload it to Cricut Design Space as a print and cut design.
- Select "complex" image type. On the next screen, select "continue" and the following screen, select "save as a print and cut project".
- Insert the image onto the next screen, then select "make it".
- Load the white card stock into your printer and print the project.
- Place the printed card stock paper onto your light grip mat as shown on the screen in Cricut Design Space.
- Select medium-thickness card stock as the material.
- Load the light grip mat into your Cricut cutting machine and tell it to cut.
- When the cut is complete, weed the design and, if you want your centerpiece to be two-sided, repeat to make a second design.
- Hot glue the Cricut-cut design to the end of the dowel, then insert the dowel into the floral foam. Trim the dowel as desired.
If you definitely want to make this easy DIY baby shower centerpiece craft, but maybe you want to scope a few more options before breaking out the paint, take a second and pin the tutorial here to your favorite baby shower ideas board on Pinterest so you can find it again when you’re ready!
Baby Shower Food Ideas:
- Unicorn Baby Shower Food Ideas – If you are having a unicorn baby shower, you need all of these fun themed foods.
- Pink non-alcoholic drink recipes – Over 20 recipes for pink colored, non-alcoholic drinks for your party.
- Pink Desserts – these 22+ pink colored desserts are sure to help you in your baby shower food planning!