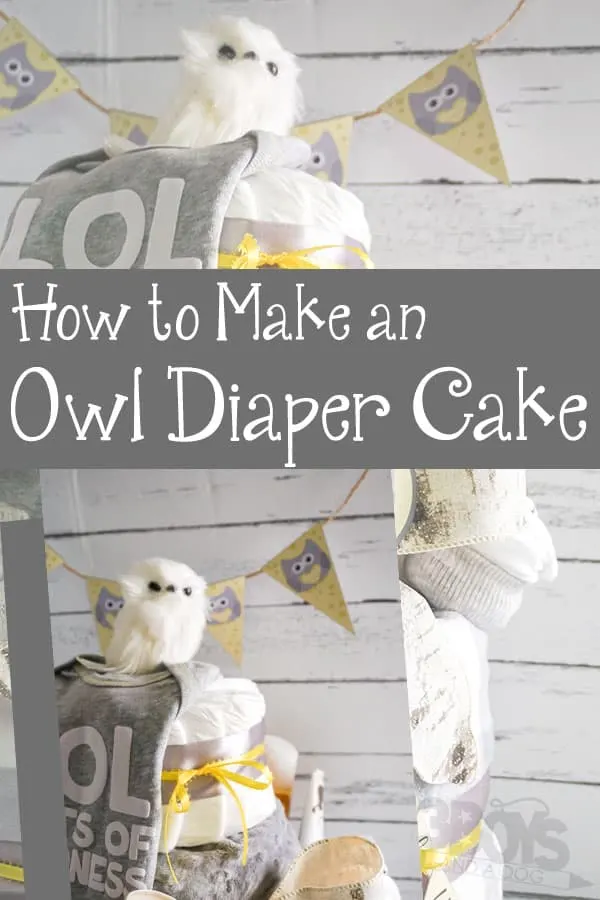
A diaper cake is the perfect baby shower centerpiece and this owl themed diaper cake is literally the best DIY owl diaper cake you’ll find!
If you’re looking for more owl baby shower ideas, be sure to check out my 12+ owl baby shower ideas to make the perfect baby shower party that’s a total hoot. Heh.

Disclosure: I work with Cricut as a Brand Ambassador. This post also contains affiliate links.
But back to this specific owl baby shower diaper cake. If you’ve ever wondered how to make your own owl diaper cake, this is seriously the easiest way to do it.
No tricks, crazy kits you’re only going to use one time or anything the mom-to-be will have trouble pulling apart at 3am when that new baby makes a new poopy.
Easy is the name of the game and I’m seriously excited to share this with you.
Owl Diaper Cake Inspiration
Look, I get it, not everybody is into the idea of making a DIY diaper cake for a baby shower. Whether it’s that you don’t have time or you’re hitting a brick wall of inspiration, I get it. Let me repeat that: I. Get. It.
So, I pulled together these awesome owl diaper cakes you can just grab if you’re just not into making one.
Also, these are just really good for looking at before you make your own diaper cake, just for inspiration of what you can do and whatnot.
- Baby Girl Pink Owl Diaper Cake
- Teal and Orange Diaper Owl Cake
- Bathtime Owl Cake
- Glittery Owl Diaper Cake
- Owl-Shaped Diaper Cake
- Deep Green Woodland Diaper Cake with Owls

Necessary Materials to Make a Diaper Cake:
Making a diaper cake is actually a lot simpler than it looks. Seriously–I thought it was like this big huge thing and it turns out you can make one in about 20 minutes. A basic diaper cake just requires four things:
- Diapers (obviously)
- 12-inch Cake Plate
- Rubber Bands
- Cake Pans
And then comes the fun stuff! You’re going to need some extra goodies, little baby gifts and other baby items to go decorate the DIY diaper cake:
- White Noise Owl
- Owl Swaddling Blankets
- Owl Milestone Blanket and Sticker Set
- Little Owl Socks (to make the sock cupcakes)
- Owl Stuffy (for the diaper cake topper)
- Baby Onsies with Owls
- Owl Blanket
Fun Decorations:
You can always use basically anything you’d like to decorate your baby shower diaper cake. But, because I wanted to be uber-extra, I made some print-and-cut pieces for the Cricut that I could just pop out at home and then use on my diaper cake!
You can find each of the coordinating items below:
- Owl Baby Shower Invitations
- Owl Themed Shower Decoration Pieces (the mini-banner, big banner, cupcake toppers, bow centerpiece and table scatter)
- Owl Baby Shower Games

Tips and Tricks:
So, because building a diaper cake can be a little daunting if you’ve never done it before, I’ve come up with some tricks to help you be successful on the first try.
- Don’t freak out if you get your diapers wrapped up tight in the cake pan and you still have some diapers left over. You can always make a second cake from diapers or you can just toss them in a bag to hand to the mom-to-be.
- If you don’t like how lumpy the sides of your owl diaper centerpiece look, you can do one of two things. You can either use more rubber bands to kind of straighten everything. Or, you can wrap your centerpiece with ribbon to hide the lumps (that’s what I did).
How Many Diapers Do You Need to Make a Diaper Cake?
So, really, it’s kind of hard to know. But, I like to start with a pretty standard set of diapers and then have a few left over. Here’s what I grabbed:
- 1 Small Package Newborn Size Diapers – about 20
- 1 Large Package Size 1 Diapers – about 75

DIY Owl Themed Diaper Cake
This easy owl themed diaper cake is so simple to make--you can have it together in 20 minutes and be ready to take it to the baby shower!
Materials
- 1 Small Package Newborn Size Diapers (about 20)
- 1 Medium Package Size 1 Diapers (about 75)
- Graduated Cake Pans (size 6, 8 and 9 1/2)
- 12-inch Cake Board/Plate
- 12-24 Large Rubber Bands
- 1 Receiving Blanket
- 1 Baby Blanket
- 1 Owl Topper
- Ribbons
- 1 Cardboard Tube (paper towel roll), optional
- 2 Baby Socks, optional
- 3 Baby Onesies, optional
Tools
- Scissors
- Hot Glue Gun & Glue
- Tape, optional
Instructions
- Remove the diapers from their packaging.
- Stack the newborn sized diapers 3-4 at a time, fanning them out horizontally and forming a spiral, fit inside the smallest cake pan.
- Fill the cake pan with the diapers completely, then wrap a rubber band around them, securing them in the shape of the pan.
- Remove the cake pan and set aside the roll of diapers.
- Repeat creating a roll of diapers using the size 1 diapers in both the second largest and largest cake pans.
- Place the largest diaper roll on top of the cake board/plate. Optional: tape this in place--however, be aware that this could damage the diapers.
- Wrap the baby blanket around the largest diaper roll, folding the blanket to only be as wide as the diapers are tall.
- Wrap a rubber band around the baby blanket, securing it in place around the diaper roll.
- Place the second largest diaper roll on top of the largest.
- Place the smallest diaper roll on top of the second largest.
- Wrap the receiving blanket around the smallest diaper roll, folding the blanket to only be as wide as the diapers are tall.
- Wrap a rubber band around the receiving blanket, securing it in place around the diaper roll.
- To hide the rubber bands, wrap a ribbon around the diaper rolls, hot gluing or taping them in place. To avoid damaging a diaper, hot glue only ribbon-to-ribbon.
- Add owl topper.
- Tie a section of ribbon into a bow and affix to the center tier.
- Decorate as desired. I added a onesie hanging off the top tier, some baby gear and a couple of sock/onesie cupcakes. To make the sock/onesie cupcakes, just fold the onesies in half, then roll them up, with an inside-out sock in the middle. Then, when the onesie is rolled tightly, fold the sock up around the onesie to secure it in place.
More Owl Baby Shower Ideas:
More Fun Baby Shower Ideas:
- Unicorn Baby Shower Food Ideas – If you are having a unicorn baby shower, you need all of these fun themed foods.
- Pink non-alcoholic drink recipes – Over 20 recipes for pink colored, non-alcoholic drinks for your party.
- Pink Desserts – these 22+ pink colored desserts are sure to help you in your baby shower food planning!


