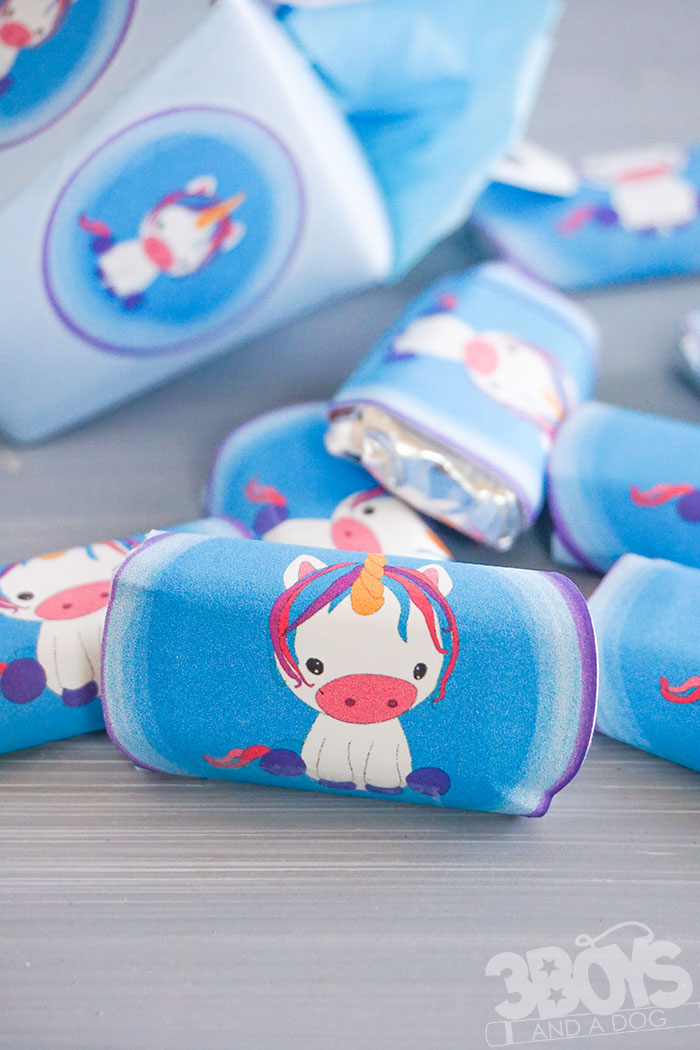
Unicorn Chocolate Bar Wrappers

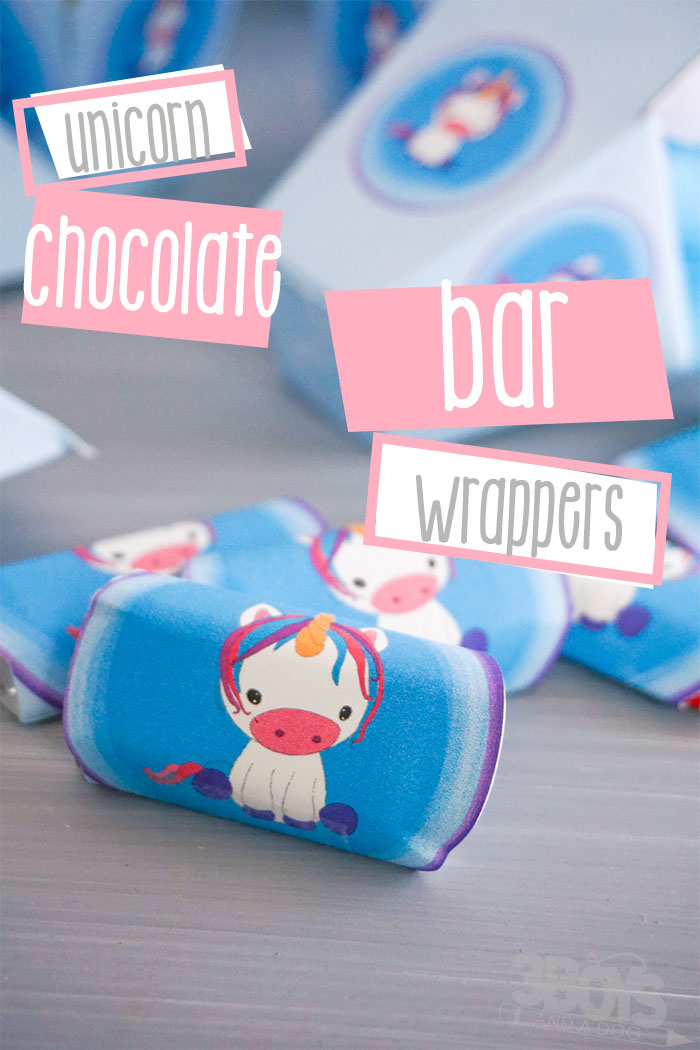
One of my favorite types of party favors is chocolate. And these Unicorn Chocolate Bar Wrappers make having a themed favor so easy! I mean, think about it, you don’t have to stuff anything, you don’t have to do anything.
Seriously, you can just give the kids this project to do. And then you have the perfect party favor for your unicorn baby shower!
Oh, but if you’re looking for more than just a set of candy wrappers, be sure to check out my set of unicorn baby shower ideas and tips. That way you’re armed with all the best knowledge of how this is going to go down.

Disclosure: I work with Cricut as a Brand Ambassador. This post also contains affiliate links.
But back to these adorable unicorn party favors. They’re perfect and tasty. Which, I mean, that does add quite a lot to your party favors, in my opinion. I mean, who wants a party favor you can’t eat?
What would that even be?!
Let’s get on with it and make our candy wraps.
Necessary Materials:
The materials you need to make these unicorn candy bar favors are simple. And you likely have everything on hand already. Seriously, I only needed three things:
- Regular Copy Paper
- Glue Stick, Tape or Glue Dots
- Mini Chocolate Bars (I found mine in the birthday candy section at the party store)
- Free Printable File for the Chocolate Wrappers
Now, let me explain myself a little about my paper recommendation for these printable unicorn candy bar wrappers. Normally, for my DIY baby shower projects, I recommend card stock paper because it’s thicker and going to stand up better to the little bit of a beating the project will receive like going through the mail or sitting on a table or whatever.
But in this case, you really will need a bit of wiggle room in your paper. Because you’re wrapping it around a relatively small candy, card stock is simply going to be too stiff.
And you don’t want to be folding your wrappers. That’s weird.
So, copy paper is best. Trust me on this.
Oh, and also, I needed my Cricut and the light grip mat. Kind of a given, but just in case.

Would you like to save this?
Necessary Tools:
And if you’re worried that it might be some kind of magic to make these candy wrappers with so few materials, let me tell you, it is. But not the unicorn-horn variety of magic. Nope. It’s the combination of these two tools that make these easy party favors such a simple project:
- Cricut Explore Air 2 or Cricut Maker
- Desktop Printer
And that’s it. Isn’t that just all sorts of magic?!
Tips and Tricks:
So, just in case this is kind of a daunting task for you, which it shouldn’t be, but in case, I have some tricks to help you make sure you’re successful on the first try.
- Print your chocolate wrappers at 100%. Don’t mess with the design in Design Space or Silhouette Studio. Just don’t.
- The wraps may seem a little oversized, but don’t trim them to length until you have them wrapped around your candies. The reason for this: the candies may be a different size than what I had on hand and if they look like they fit and you trim it…then you trim it too short, well, you’re having to redo your print and cut project.
More Unicorn Baby Shower Items:
I don’t know about you, but I love having full-on coordinated sets for all my party themes, whether it’s a birthday party ideas or baby showers. So, watch-out because, of course, I’m building a full set of goodies. Here’s what I’ve got so far:
Baby Shower Food Ideas:
- Unicorn Baby Shower Food Ideas – If you are having a unicorn baby shower, you need all of these fun themed foods.
- Pink non-alcoholic drink recipes – Over 20 recipes for pink colored, non-alcoholic drinks for your party.
- Pink Desserts – these 22+ pink colored desserts are sure to help you in your baby shower food planning!

More Unicorn Fun:
- Unicorn Fruit Dip
- Unicorn Cupcakes
- Unicorn Gift Ideas for Kids
- Unicorn Bark Recipe
- Adorable Unicorn Donuts

Unicorn Chocolate Bar Wrappers
Equipment
- Cricut
- Light Grip Mat
Materials
- Quality Copy Paper
- Glue Stick Tape or Glue Dots
- Mini Chocolate Bars
- Free Printable for the Chocolate Wrappers
Instructions
- Working with one sheet at a time, download the PNG Files, then upload each to Cricut Design Space.
- Select "complex" image type. On the next screen, select "continue" and the following screen, select "save as a print and cut project".
- Insert the image onto the next screen, then select "make it".
- Load the copy paper into your printer and print the project.
- Place the printed copy paper onto your light grip mat as shown on the screen in Cricut Design Space.
- Select copy paper as the material.
- Load the light grip mat into your Cricut cutting machine and tell it to cut.
- When the cut is complete, weed the design and repeat with the remaining number of chocolate wrappers you plan to make.
- Wrap a chocolate wrapper around your chocolate bar and place a dot of glue or tape on the bottom to hold the wrapper in place and enjoy!
And then you just kind of drop them all over your baby shower tables–like wonderful, tasty table scatter that gives you a little pick-me-up or scatters dementors. Whatever. LOL!