
Halloween Recipe: Yummy Mummy Cheese Spread





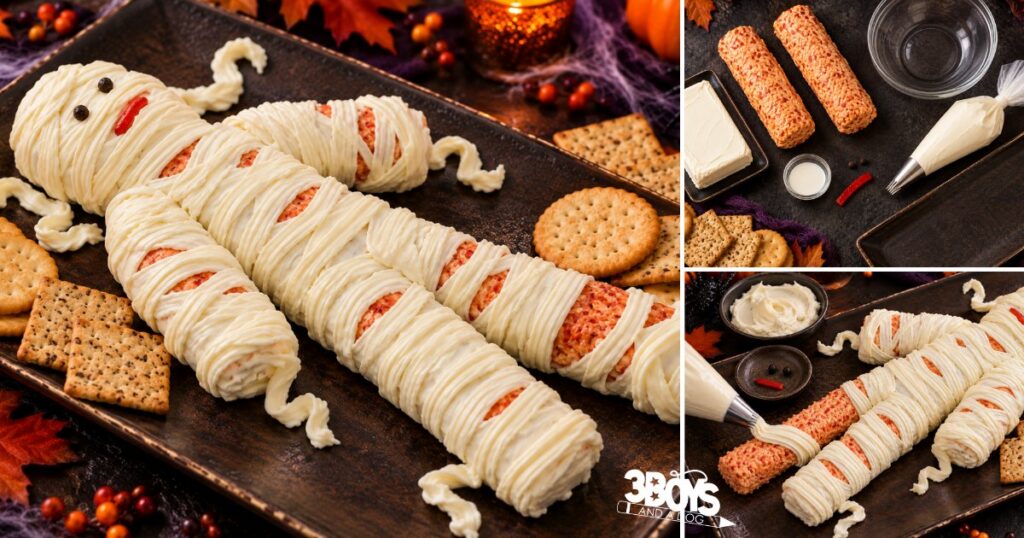
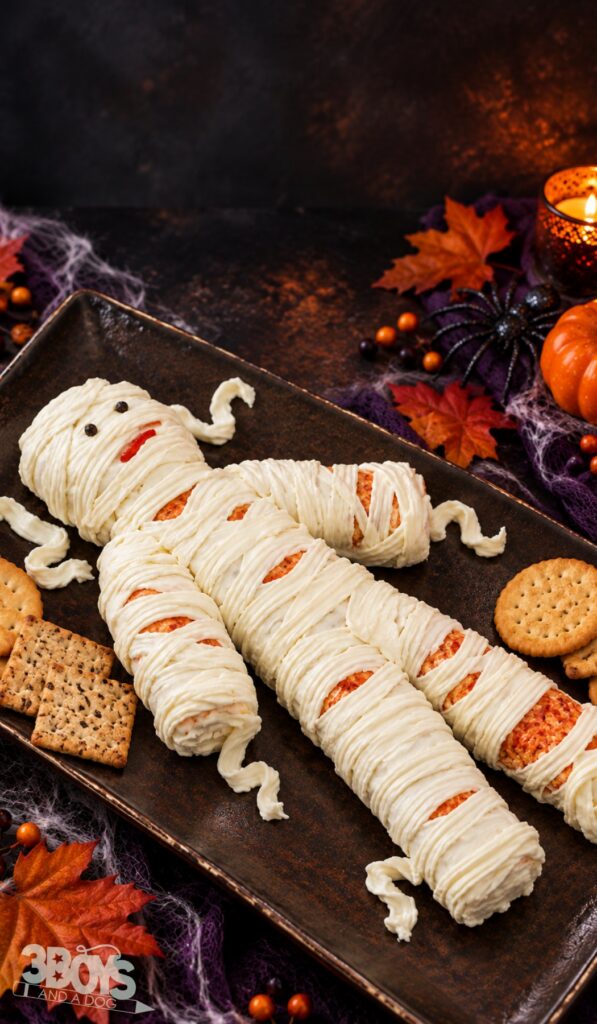
A mummy made out of cheese is the kind of Halloween appetizer people stop to look at before they eat it. This one is two port wine cheese logs cut into a head, body, arms and legs, then wrapped in piped cream cheese bandages. It looks like it took all afternoon. It takes about 30 minutes.
There’s no oven involved, only five ingredients, and it sits right at home next to the rest of your Halloween party food.

Below you’ll find what to buy, easy swaps, how to pipe the bandages without a special tip, and how far ahead you can make it.
Why This Mummy Cheese Spread Works for Halloween Parties
- No baking. It’s cutting, piping and chilling. That’s it.
- Five ingredients. Cheese logs, cream cheese, milk, two peppercorns and a pimiento strip.
- It’s a whole mummy, not just a head. Guests can break off an arm or a leg with a cracker instead of cutting into it.
- It can be made ahead. Build it the day before and keep it in the refrigerator until the party.
Ingredients and Easy Swaps
Port wine cheese logs are the classic choice. They’re soft enough to spread, firm enough to shape, and the pink color peeks through the bandages. Look for them near the specialty cheeses or in the deli, especially around the holidays.
- No port wine cheese? Any soft cheese log works, including sharp cheddar or pimento cheese. You can also shape your own logs from one of these cheese ball recipes.
- Cream cheese. Use full-fat block cream cheese, softened. Whipped cream cheese is too soft to hold piped lines.
- Milk. Just enough to make the cream cheese easy to pipe. Add it a little at a time.
- Eyes and mouth. Whole peppercorns and a pimiento strip are traditional. Sliced black olives and a thin strip of red bell pepper work too.
How to Pipe the Mummy Bandages
Would you like to save this?
Cut the cheese logs into a head, body, two arms and two legs, then arrange them on a serving platter so the pieces touch. Beat the softened cream cheese with the milk until it’s smooth and easy to squeeze.
A #47 basket weave tip gives flat, ribbon-like bandages. If you don’t have one, a zip-top bag with a small corner snipped off works fine. Pipe back and forth across the mummy at slight angles, crossing over and leaving small gaps so the cheese shows through. Messy looks more like a mummy anyway.
Press in two peppercorns for eyes, add the pimiento strip for a mouth, and chill until you’re ready to serve.
Serving and Make-Ahead Tips
- Pick sturdy dippers. Butter crackers, pretzel crisps or sliced baguette hold up to cold cheese without breaking.
- Make it a day ahead. Assemble it, cover loosely, and refrigerate.
- Let it soften. Set it out 15 to 20 minutes before serving so it spreads easily.
- Watch the clock. Keep it out no longer than 2 hours, then store leftovers covered in the refrigerator for 3 to 4 days.
- Build a spread. It pairs well with a spooky charcuterie board for a full Halloween appetizer table.
❓ Frequently Asked Questions
A few quick answers before you start.
More Halloween Appetizers and Treats

Yummy Mummy Cheese Spread

Equipment
- Dual-Sided Charcuterie Board Set or any serving platter
- Kitchen Knife Set
- Stand Mixer or a hand mixer
- Decorating Bag Set – Piping Bag and Tips with a #47 basket weave tip
Ingredients
- 2 port wine cheese logs 12 ounces each
- 1 package 8 ounces cream cheese softened
- 1 Tablespoon(s) 2% milk
- 2 whole peppercorns
- 1 pimiento strip
Instructions
- Cut the cheese logs into pieces for the head, body, two arms and two legs. Arrange them on a serving platter so the pieces touch.
- Beat the softened cream cheese and milk until smooth. Spoon it into a piping bag fitted with a #47 basket weave tip, or into a zip-top bag with a small corner snipped off.
- Pipe crisscrossing rows of bandages over the mummy, leaving small gaps so the cheese shows through.
- Press in the peppercorns for eyes and add the pimiento strip for a mouth. Chill until ready to serve.


This Mummy is just adorable and very tasty! Thank you so much for sharing with Full Plate Thursday and hope you are having a great weekend!
Come Back Soon,
Miz Helen
This is a great recipe. I think I will add this one to my recipe ‘to-do’ list! Thank you for linking up this week to the Thoughtful Spot Weekly Blog Hop 🙂
This is sooo cute…how fun for kids and grown ups alike.
over from Showcase
So cute and what a fun party idea plus I love all of the ingredients. I would love for you to stop by and share it on our Four Seasons party – it is such a great fit!
Terri Henkels
What a neat idea!