
Halloween Recipe: Spooky Spider Cake



A cake shaped like a giant spider sounds like a project for a professional decorator, but this one comes together with two boxed cake mixes, a simple homemade frosting, and a handful of piping tips anyone can pick up in an afternoon.
It’s part of a full lineup of Halloween treats built the same way, starting with an easy cake mix base so the hard part is the decorating, not the baking.
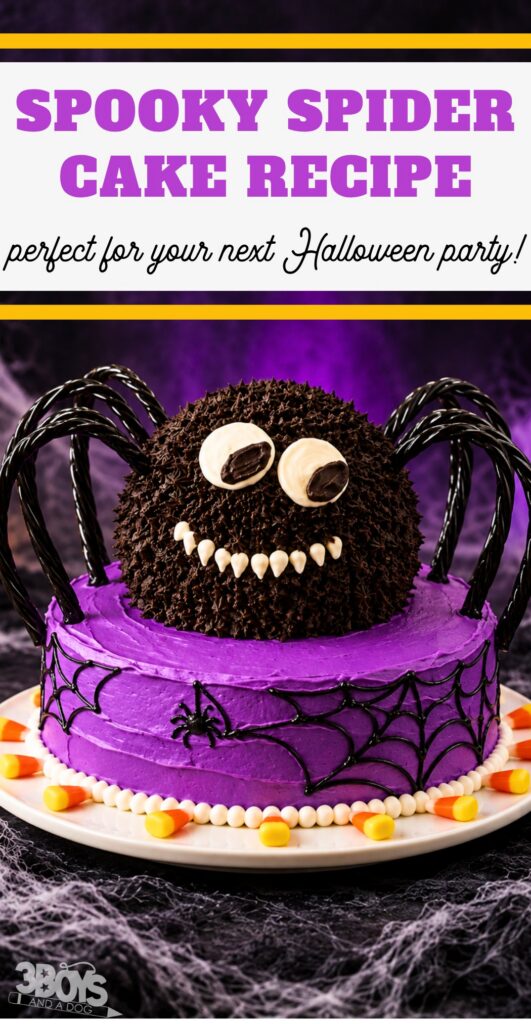
Here’s what actually goes into building it, plus a few tips that make the assembly less messy the first time around.
What You’ll Need for This Spider Cake
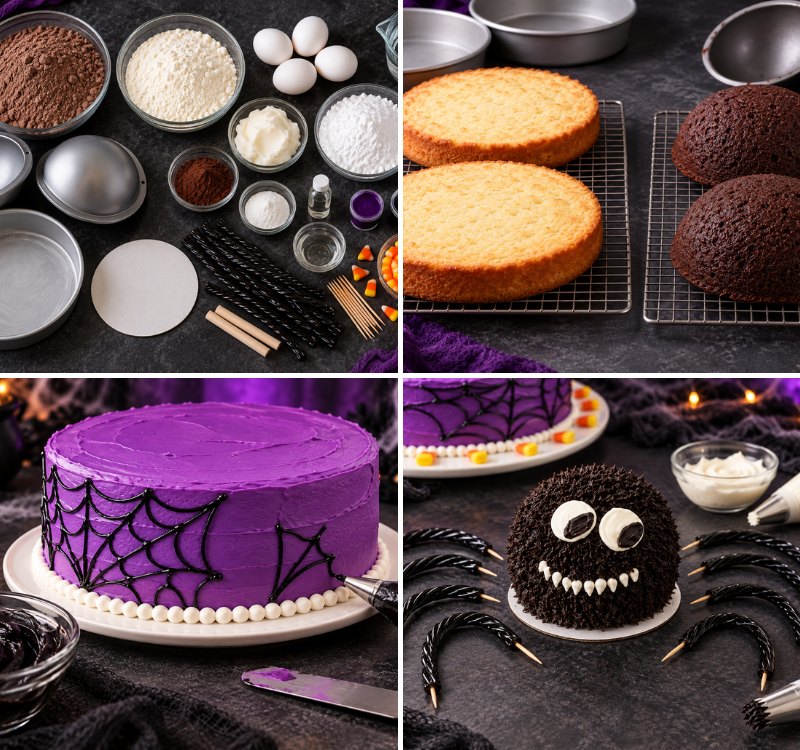
The ingredient list looks long, but most of it is frosting. Here’s how it breaks down so you can shop once.
- Two boxed cake mixes. A chocolate mix for the spider and a white mix for the purple base. Each one only needs water and eggs.
- Homemade decorator frosting. Shortening, powdered sugar, clear vanilla and meringue powder make a stiff, bright white frosting that holds piped details. Clear vanilla keeps it white, so the purple and black tint evenly.
- Cocoa and paste food coloring. Cocoa gives the black frosting a dark base, so it takes much less black coloring. Paste color won’t thin the frosting the way liquid color does.
- Candy for decorating. Eight black twist licorice ropes for the legs and about 20 pieces of candy corn around the base.
- Assembly supplies. Two short wooden dowels, a 6-inch cardboard cake circle and 16 toothpicks.
For tools, you’ll need a sports ball pan (a two-piece dome pan) for the spider body, two 9-inch round pans, a stand mixer, a serrated knife, and piping tips #2, #12, #18 and #233. No sports ball pan? Bake the chocolate batter in two matching oven-safe glass bowls, greased and floured, and start checking with a toothpick a few minutes early.
How to Make a Spider Cake
The full measurements and steps are in the recipe card below. This is the order of operations, which is what makes the build go smoothly.
Bake the Cakes
Bake the chocolate cake in the sports ball pan and the white cake in the two 9-inch rounds. Let everything cool in the pans for 10 minutes, then turn the cakes out onto wire racks and let them cool completely. Warm cake melts frosting, so don’t rush this part.
Frost the Base and Pipe the Web
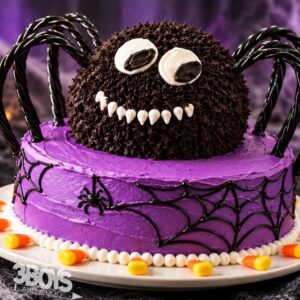
Tint part of the frosting purple. Stack the two white layers with frosting in between, then cover the top and sides. Mix cocoa into more of the frosting and tint it black, then stir a little corn syrup into a small amount for piping, which gives the webs a glossy finish. Pipe webs and small spiders around the sides with a #2 round tip, then add a white shell border along the bottom with a #18 tip.
Build the Spider
Push the dowels into the center of the base cake and set a 3¼-inch cardboard circle on top so the spider has something solid to sit on. Level one chocolate dome, attach it to the circle with black frosting, spread more frosting on top, and add the second dome to make a ball. Cover it in fuzzy “hair” with the #233 grass tip, pipe white eyes and teeth with a #12 tip, and add black pupils with the #2 tip. Put a toothpick in each end of the licorice ropes, push one end into the spider and the other into the purple cake, then finish with candy corn around the plate.
Tips for Making the Spooky Spider Cake
- Let both cakes cool completely before frosting, or the layers will slide.
- Tint the black frosting a few minutes ahead of piping. The color deepens as it sits.
- Use the dowels. They keep the spider cake from sinking into the base once it’s assembled.
- Pipe the web design onto the base cake before adding the spider on top. It’s much easier while everything is still flat.
Easy Spider Cake Variations
- Pink spider cake. Tint the base pink instead of purple for a birthday party. The black web and spider still stand out against it.
- Shortcut frosting. Canned vanilla frosting works for filling and covering the base layers if you’re short on time. Save the homemade frosting for the hair, eyes and webs, since it holds its shape better.
- All-chocolate version. Use chocolate cake mix for the base layers too. Only the outside needs to be purple.
- Spider cupcakes. Frost cupcakes purple, pipe a small black web on each one, and add short licorice pieces for legs on top of a dollop of black frosting.
How to Store and Make It Ahead
The cakes can be baked up to a month ahead. Once they’re completely cool, wrap each one tightly in plastic wrap and freeze. Let them thaw in the wrap at room temperature before frosting.
The frosted base can be made a day ahead and kept in the refrigerator. Build the spider and add the licorice legs on the day you serve it so the legs stay firm and upright.
Would you like to save this?
Store leftovers covered in the refrigerator for 3 to 4 days.
❓ Frequently Asked Questions
A few things worth knowing before you start on this one.
More Halloween Treats to Try
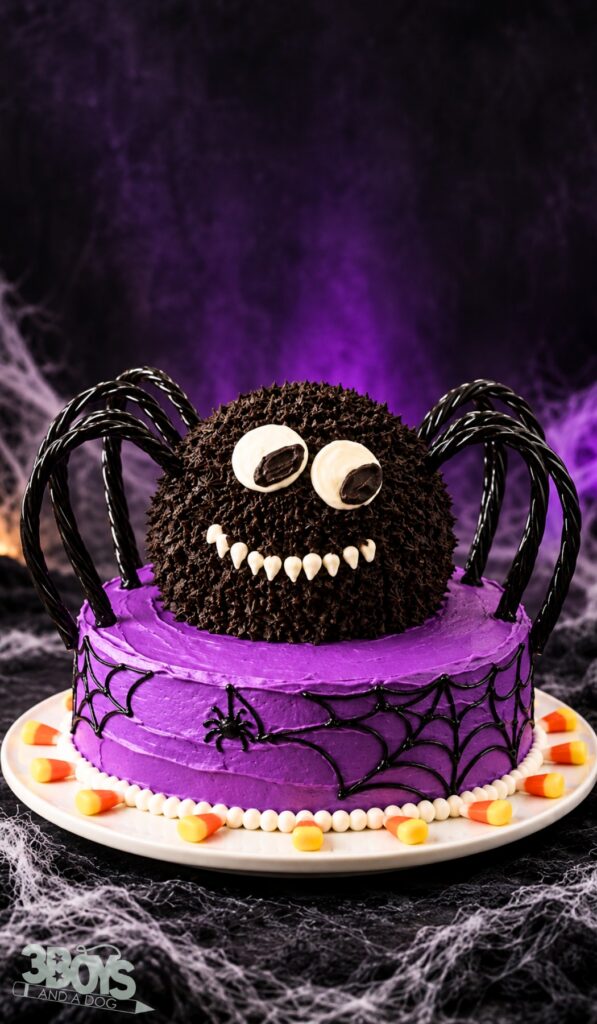
Spooky Spider Cake

Ingredients
- CHOCOLATE CAKE:
- 1 package 18-¼ ounces chocolate cake mix
- 1-½ Cup(s) water
- 2 eggs
- WHITE CAKE:
- 1 package 18-¼ ounces white cake mix
- 1-1/3 Cup(s) water
- 2 eggs
- FROSTING:
- 2 Cup(s) shortening
- ¼ Cup(s) plus 2 tablespoons water divided
- 2 teaspoons clear vanilla extract
- 2 pounds confectioners’ sugar
- 2 tablespoons meringue powder
- Purple and black paste food coloring
- ¾ Cup(s) baking cocoa
- ¼ teaspoon light corn syrup
- ASSEMBLY:
- 2 wooden dowels 2 inches x ¼ inch
- 1 cardboard cake circle 6 inches
- 16 wooden toothpicks
- 8 black twist licorice ropes
- 20 pieces candy corn
Instructions
- In a large bowl, beat the chocolate cake mix, water and eggs on low speed for 30 seconds. Beat on medium for 2 minutes. Pour into the two halves of a greased and floured sports ball baking pan. Bake at 350° for 40-50 minutes or until a toothpick inserted near the center comes out clean.
Meanwhile, in another bowl, beat the white cake mix, water and eggs on low speed for 30 seconds. Beat on medium for 2 minutes. Pour into two greased and floured 9-in. round baking pans. Bake for 30-35 minutes or until a toothpick comes out clean.
Cool all cakes for 10 minutes before removing from pans to wire racks to cool completely.
For frosting, using a heavy-duty stand mixer, combine the shortening, ¼ cup water and vanilla. Combine confectioners’ sugar and meringue powder; beat into shortening mixture.
For base cake: Tint 2-¼ cups frosting purple. Using a serrated knife, level tops of white cakes if necessary. Place one cake layer on a serving plate; spread with 1 cup frosting. Top with remaining cake layer. Spread remaining tinted frosting over top and sides of cake.
Combine 3 cups frosting, cocoa and remaining water until smooth; tint black. Combine ¼ cup black frosting and corn syrup. Using round tip #2 and black frosting with corn syrup, pipe webs and spiders around sides of cake.
With ¾ cup white frosting and shell tip #18, pipe border along bottom edge of cake. Insert dowels into center of cake. Cut cardboard circle to measure 3-¼ in.; place over cake.
For spider cake: Using a serrated knife, level the rounded side of one chocolate cake; attach to cake circle with a small amount of black frosting. Spread top with 1/3 cup black frosting; top with remaining chocolate cake.
Using grass tip #233 and black frosting, pipe hair over cake. With white frosting and round tip # 12, pipe eyes and teeth. Pipe pupils with round tip #2 and black frosting. For legs, insert a toothpick into the ends of each licorice rope. Insert one end into side of spider; insert other end into top of purple cake. Garnish with candy corn.


What a super cute cake for Halloween! I’m sharing on fb and pinning! Thank you for sharing this with us gals!
What an adorable cake! It’s just the right amount of spooky for my two little girls.
Hi Kelli,
Your Spooky Spider Cake is just precious and Spooky too. Thank you so much for sharing with Full Plate Thursday and have a great weekend!
Come Back Soon,
Miz Helen
This is so cute! I’m going to save it for Halloween weekend. He’s almost too cute to eat…almost!
Love this spider cake, it’s SO cute! I’m hosting a linky party today if you want to come join.
cass-eats.blogspot.com
This really turned out cute-love it:@)
Cute!
This is ADORABLE! Thanks for linking up for Life Created Tuesdays!
looks great!