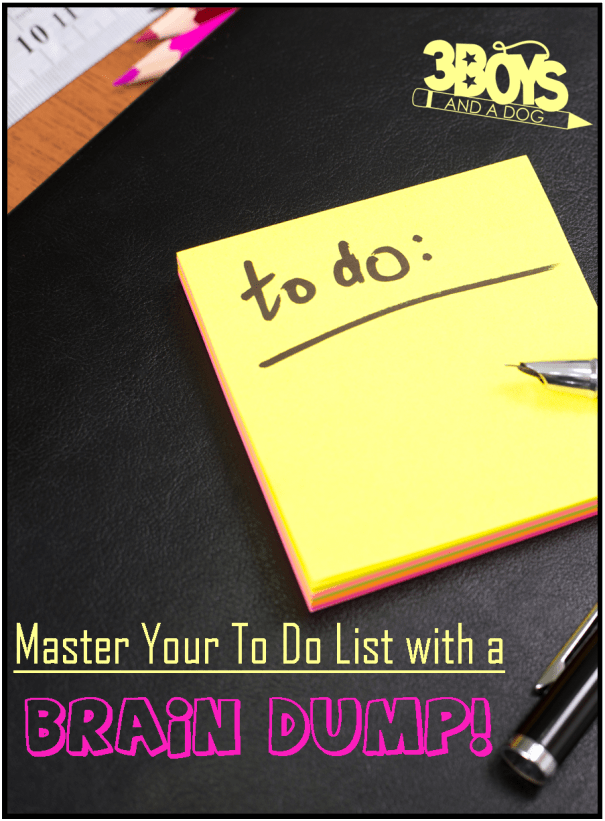
I have had this post sitting in my draft folder for a very long time. Today, I received an email that pushed me to actually complete my Brain Dump (aka: Master To Do List), get it all organized, and complete my post.
A couple weeks ago, I bought Christy Love’s Gold Package on her Simple Organized Sanity site. The gold package also got me her Weekly Organizing Challenge (it is 5 dollars for 1 year of emails!) emails. Today’s 9 minute MP3 message was all about using a Brain Dump to complete your Master To Do List (ahh great minds think alike!). Using some of her products, I sorted and organized my household notebook and started using my master to do list.
Grab a notebook or lined paper, set a timer for 15-20 minutes, and start writing down every thing that needs doing. EVERYTHING! Maybe it is a post you have been meaning to finish (ahem *cough), a window that needs a blind, or just cleaning out the fridge. Write it down… don’t stop to think, just WRITE!
Step 3: Begin Building Your Master To Do List
Now, you want to organize it into a more manageable list. Christy’s To Do Trackers are perfect for this because they have two columns. One for short tasks and one for longer projects. I sorted all the tasks that I had brain dumped onto each sheet: Personal, Business, Around the House and put them in the correct column. 🙂
Would you like to save this?
We'll email this post to you, so you can come back to it later! You'll also get regular recipes & printables to your inbox!
So, what to do about the long projects? Later, you could begin breaking down those projects!
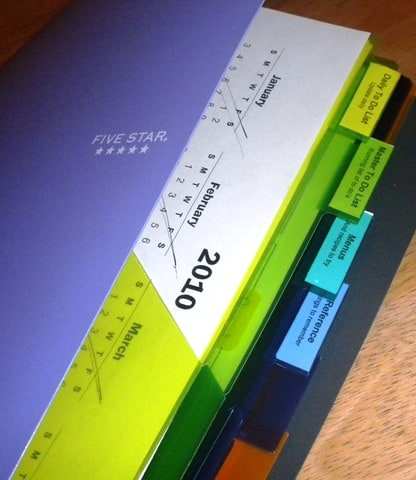
Step 4: Combine Into Your Notebook!
I have the 8-divider pack sorted into the following sections:
Daily To Do List – I have a month’s worth of pages already printed and have a blank sheet at the end. If something comes up, it goes automatically onto the date it is due. If it is so far in the future that I don’t currently have a page printed, then it goes onto my blank sheet of paper. Each month, I have a note to print more sheets and update the list.
Master To Do List – (see above) I mark them off as they are complete and add more as I think of them 🙂 Please note, my Master List does not include those normal everyday tasks, weekly tasks, or monthly tasks. I put those onto my daily list. They contain things like: put together shed, get Tank a hair cut, complete cross-stitch blanket.
Menu – In one pocket I have our tried and true recipe check list and in the other pocket, I have all the print outs, ripped, pages, jotted notes, etc of recipes we would like to try. If we try it and like it, the recipe goes in my recipe box and the title gets added to our check list. In the rings, I have my monthly and weekly sheets.
Reference – This is just a generic section for all the junk that comes up. 🙂 I have several blank sheets of paper there so I can scribble reminders. For example: right now it says, “Project section – S.O.S sheets”
As I was putting my binder together, I couldn’t think of sections that I would really need to fill all my tabs. Some people like to include their address book, school section, calendar, etc here. I do not. 🙂 I have a plain calendar in my first pocket and a monthly to do sheet in my second pocket. That is enough of a calendar for me. Otherwise, it gets written on the calendar on the wall… or if it is blogging related, it goes in my BusyBodyBook.
But, then I decided that I really need a project section. I always have a million projects going on at one time and need to get them a bit more organized. As time permits, I will make that section and any others that I think of. 🙂
Step 5: Use Your New Notebook!
Good luck using your notebook! Maybe you should set a Google Calendars or Outlook reminder to pop up each day reminding you to check your notebook. It only takes 29 days to make a habit. Wouldn’t it be nice to be better organized before the craziness of summer hits!?
Such a great post and for the perfect time of year too. This is the season while trapped inside I do a ton of clearing the decks! Thanks so much for sharing this with us at the DI & DI Link Party.
Great organizer ideas, Kelli! Have not been here in a while so let me say – I love your logo 🙂 Thanks for sharing this post over at the #HomeMattersParty
Hello, i read your blog from time to time and i own a
similar one and i was just curious if you get a lot of
spam responses? If so how do you prevent it, any plugin or anything you can
recommend? I get so much lately it’s driving me mad so any help is very much appreciated.
Hi, I do believe this is an excellent site. I stumbledupon it 😉 I’m going to revisit once again since I book marked it. Money and freedom is the greatest way to change, may you be rich and continue to help other people.
Superb post but I was wondering if you could write a litte
more on this subject? I’d be very thankful if you could elaborate a little bit more. Many thanks!
Found your site when looking for other websites I could direct my readers to. Found this blog. Great minds DO think alike! I provided a link to your blog in my new blog 111 Ways to Take Action. Your Brain Dump is much more organized than mine 🙂
I ran across your blog as I was researching Google for anyone writing about “to-do’s” or brain dumps. I found yours and and included a link to your blog in my new blog. Great minds do think alike! http://111waystotakeaction.blogspot.com/


Such a great post and for the perfect time of year too. This is the season while trapped inside I do a ton of clearing the decks! Thanks so much for sharing this with us at the DI & DI Link Party.
Great tips! Thanks for sharing on Welcome Home Wednesday, we hope to see you this week.
Great organizer ideas, Kelli! Have not been here in a while so let me say – I love your logo 🙂 Thanks for sharing this post over at the #HomeMattersParty
Very helpful idea. I am the queen of sticky notes so this would help get me more organized.
What a great idea! I need to do a massive brain dump, haha 🙂 I found you on the Good Tips Tuesday Linkup Party. Thanks for sharing!
Hello, i read your blog from time to time and i own a
similar one and i was just curious if you get a lot of
spam responses? If so how do you prevent it, any plugin or anything you can
recommend? I get so much lately it’s driving me mad so any help is very much appreciated.
Fabulous, what a website it is! This webpage presents
helpful data to us, keep it up.
Hi, I do believe this is an excellent site. I stumbledupon it 😉 I’m going to revisit once again since I book marked it. Money and freedom is the greatest way to change, may you be rich and continue to help other people.
WOW just what I was searching for. Came here by searching for fun math
I think the admin of this web page is in fact working hard
for his web page, because here every data is quality based information.
Superb post but I was wondering if you could write a litte
more on this subject? I’d be very thankful if you could elaborate a little bit more. Many thanks!
Found your site when looking for other websites I could direct my readers to. Found this blog. Great minds DO think alike! I provided a link to your blog in my new blog 111 Ways to Take Action. Your Brain Dump is much more organized than mine 🙂
I ran across your blog as I was researching Google for anyone writing about “to-do’s” or brain dumps. I found yours and and included a link to your blog in my new blog. Great minds do think alike! http://111waystotakeaction.blogspot.com/
Love this. I came here from Crystal & Co. You sounded so knowledgeable with your comment left there.
I am also a homeschooler, and have 3 boys. No dog.
It’s a pleasure to meet such a savvy woman. Hope some of it rubs off on me!!
Have a wonderful Mother’s Day.
How awesome is that? Very impressive!
.-= Crystal & Co´s last blog ..Blogger Appreciation Day =-.