
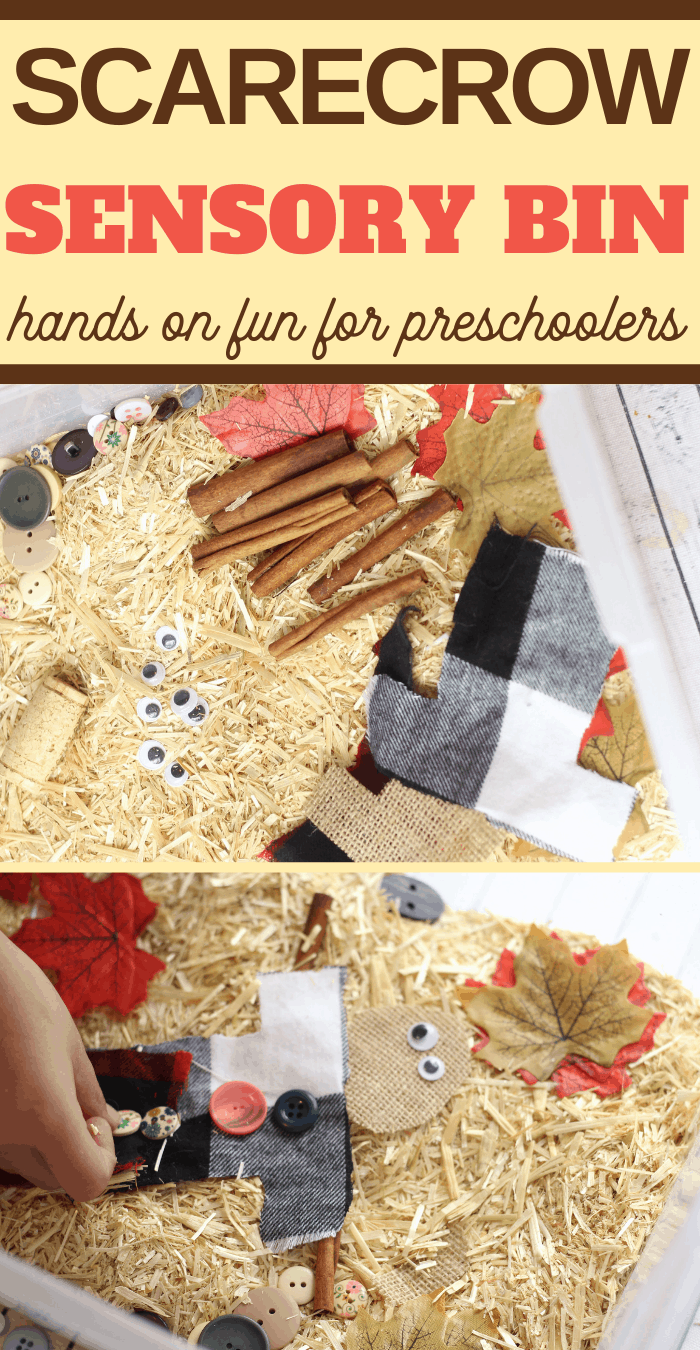
Build a Scarecrow Sensory Bin
This easy fall build a scarecrow sensory bin activity is a fun way for kids to play and learn about fall–and all the exciting changes that come with this season!
Kids love to touch. smell, investigate, and build. The more hands on the activity, the happier they usually are. This fun fall scarecrow sensory activity let’s them do all that and more.


How to Use This Build a Scarecrow Sensory Bin
Let’s talk specifically about this fall sensory activity. Super simple and lots of fun, the kids will love playing while doing this learning activity. This could be a Wizard of Oz activity, a fall decoration, or just one of the easy fall crafts you do with your kiddo.
To add a learning layer to your bin you can have your child count buttons, identify colors. Tell you the first letter of the objects, sort by size or shape, or older children could even write the words for the items in the bin.
What’s in this Scarecrow Sensory Bin
The following items are affiliate links on Amazon because they may be a bit hard to find in your normal store. I wanted you to be able to see exactly which things we are using. You will need:
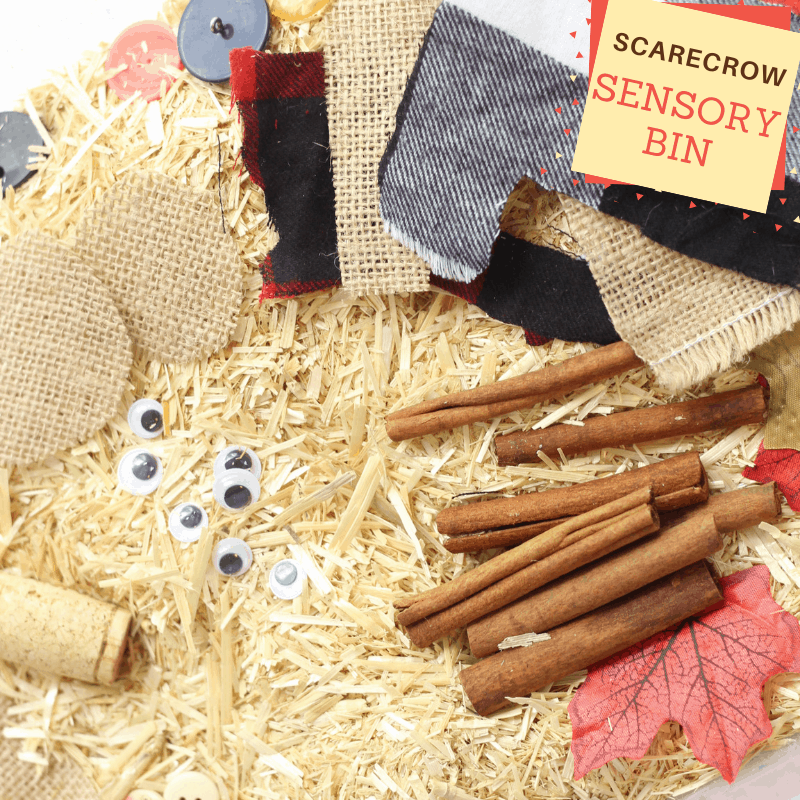
- Hay/straw
- Flannel and burlap scraps
- Buttons
- Googely eyes
- Corks
- Cinnamon sticks
- Pipe cleaners
- Fall leaves
- Pieces of wood
- Doll straw hat
- Doll clothing
- Marker or pencil to make facial features on whatever scarecrow head is made
Reminder, not all items are linked above, just the ones that may be a bit difficult to find or that you might be unsure of what to look for.

How to Make this Scarecrow Sensory Box
Grab a bin- for one or two sets of hands an 18” x 24” plastic tub is great and maybe a shower curtain liner or sheet underneath it to help make clean up easier.
Would you like to save this?
Start by giving them a good thick base of hay or straw. You can get actual hay/straw at a feed store or from a friend with stock and it smells wonderful too! I like to use these mini hay bales that I found at the craft store because it is already dried and very clean.
Fill the bottom of your tub with the hay or straw. At least 2” deep makes a good base.
Next add in some fall leaves, cinnamon sticks, twigs from the yard, or other natural items.


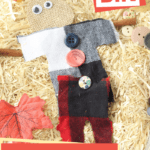
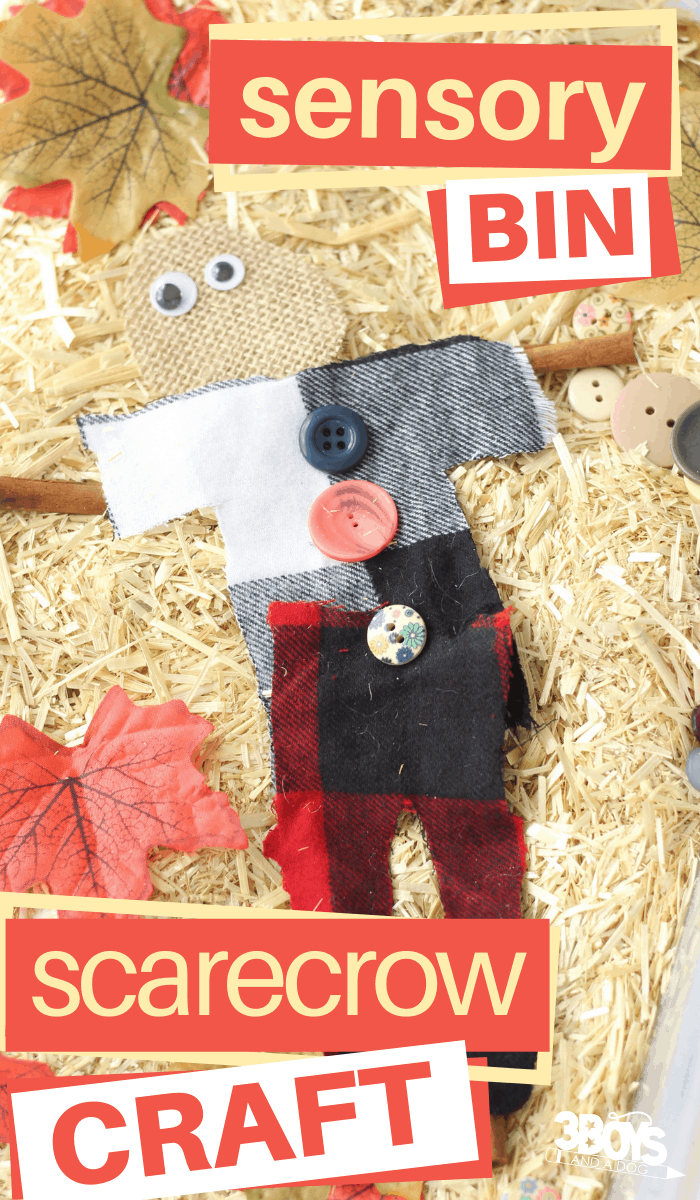
Add in a few different scraps of fabric. Flannel, felt, and burlap are ideal. You can cut fabric into the basic shapes of clothing like pant legs or a shirt that can get stuffed with straw. Or you can just leave them as scraps and let your child’s imagination shape them.
Add the rest of your tools, then finally be sure to include some spoons, or a fork (we used ours as a pitchfork for moving hay) and some containers for filling and pouring.
When your kiddo is done, you can let them display their scarecrow on the front porch with some metal milk jugs.
This is a great stand alone activity for rainy days or when you need something to keep them busy so dinner can be made but also can be used to support a favorite fall book like The Little Old Lady Who Was Not Afraid of Anything or Scarecrow.
More Sensory Activities You Might Like:
Once you make this Fall Sensory Bin, your kiddo is going to be absolutely in love with the idea of sensory play. So, be ready to make some more seasonally-themed sensory activities for them with these simple ideas:
- Valentine Sensory Bin
- Popping Snow Auditory Sensory Activity
- Applesauce Ornaments Olfactory Sensory Fun

Scarecrow Sensory Bin
Equipment
- Marker or pencil to make facial features on whatever scarecrow head is made of
Materials
- Hay/straw
- Flannel and burlap scraps
- Buttons
- Googely eyes
- Corks
- Cinnamon sticks
- Pipe cleaners
- Fall leaves
- Pieces of wood
- Doll straw hat
- Doll clothing
Instructions
- Grab a bin- for one or two sets of hands an 18” x 24” plastic tub is great and maybe a shower curtain liner or sheet underneath it to help make clean up easier. Also, gather all of your materials.

- Start by giving them a good thick base of hay or straw. You can get actual hay/straw at a feed store or from a friend with stock and it smells wonderful too! I like to use these mini hay bales that I found at the craft store because it is already dried and very clean.
- Fill the bottom of your tub with the hay or straw. At least 2” deep makes a good base.
- Next add in some fall leaves, cinnamon sticks, twigs from the yard, or other natural items.

- Add in a few different scraps of fabric. Flannel, felt, and burlap are ideal. You can cut fabric into the basic shapes of clothing like pant legs or a shirt that can get stuffed with straw. Or you can just leave them as scraps and let your child’s imagination shape them.
- Add the rest of your tools, then finally be sure to include some spoons, or a fork (we used ours as a pitchfork for moving hay) and some containers for filling and pouring.

- When your kiddo is done, you can let them display their scarecrow on the front porch with some metal milk jugs.


2 Comments