
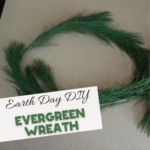
Earth Day Evergreen Wreath
Earth Day is the perfect excuse to slow down, step outside, and let kids create something with their hands. Not everything has to come from a craft store—some of the best projects start right in your own backyard.
This simple evergreen wreath is one of those crafts. It’s easy, a little messy, and a great way to turn trimmed branches or fallen greenery into something meaningful. Plus, it opens the door to conversations about trees, seasons, and taking care of the environment.

Why This Craft Works for Earth Day
This isn’t just a craft—it’s a chance to connect kids with nature in a real, hands-on way.
Instead of buying supplies, you’re using what’s already around you. Fallen branches, trimmed greenery, or even flexible vines can all be repurposed into something beautiful. It’s a simple way to show kids that not everything needs to be thrown away or replaced.
It also encourages observation. Kids start to notice textures, smells, and differences between plants—things they might normally walk right past.
This post contains affiliate links, which means I earn a commission when anything is bought. This is at no additional cost to you.
Shop My Homeschool Room:
The following homeschool picks of mine can be found on Etsy or Amazon. Simply click the image that interests you – yes, they do contain affiliate links.


What You Need
- Soft, fresh evergreen branches or flexible vines
- Hot glue gun (with supervision)
- Clothespins, clamps, or chip clips
- Scissors or garden shears (optional, for trimming)
Tip: Fresh branches are much easier to bend and shape. If they feel stiff or brittle, they may snap instead of curve.
How to Make an Evergreen Wreath
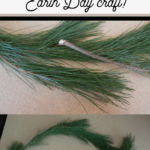
1. Gather and Prep Your Branches
Start by collecting branches that are soft and flexible. Trim them into manageable lengths if needed. Remove any excess needles or small offshoots that might get in the way while shaping.
2. Overlap and Build the Base
Lay two branches end to end, overlapping them by about 2–3 inches. This overlap is what helps hold everything together and keeps the wreath sturdy.
3. Secure as You Go
Add a small amount of hot glue where the branches overlap, then use a clamp or clothespin to hold them in place while the glue sets. This makes the process much easier (and faster) than trying to hold everything by hand.
Would you like to save this?
4. Keep Adding and Shaping
Continue adding branches one at a time, gently bending them into a circular shape as you go. Clip and glue each section before moving on to the next.
5. Close the Circle
Once your wreath is almost complete, connect the final branch back to the beginning. Adjust the shape as needed—it doesn’t have to be perfect.
6. Fill and Finish
If you have extra branches, weave them into the wreath to fill in gaps or add texture. Let everything dry completely before handling.

Tips for Success
- Work in small sections: Trying to glue too much at once can get messy and frustrating.
- Use clips generously: They hold everything steady so kids can stay involved without needing to “hold and wait.”
- Embrace imperfections: A slightly uneven wreath adds character and reminds kids it’s handmade.
- Keep safety in mind: If kids are helping, an adult should handle the hot glue gun.
Make It an Educational Moment
This craft naturally leads into learning without it feeling like a lesson.
As you build, you can talk about:
- The difference between evergreen and deciduous trees
- Why some trees keep their needles year-round
- How trees help the environment (clean air, shade, habitats)
It’s a simple way to turn crafting time into curiosity time.
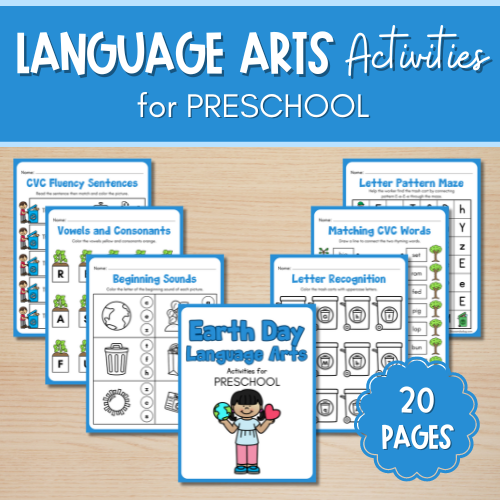
Shop My Printables:
Check out these great Earth Day resources in my shop! Perfect for more learning fun!


Easy Ways to Customize Your Wreath
Once your base is done, you can keep it natural or decorate it:
- Add pinecones, acorns, or dried flowers
- Tie on a ribbon or twine for hanging
- Attach a handmade Earth Day sign or tag
- Paint small wooden shapes or recycled materials to glue on
Earth Day Evergreen Wreath
Materials
- Soft, fresh evergreen branches or flexible vines
- Hot glue gun (with supervision)
- Clothespins, clamps, or chip clips
- Scissors or garden shears (optional, for trimming)
Instructions
- Start by collecting branches that are soft and flexible. Trim them into manageable lengths if needed. Remove any excess needles or small offshoots that might get in the way while shaping.
- Lay two branches end to end, overlapping them by about 2–3 inches. This overlap is what helps hold everything together and keeps the wreath sturdy.
- Add a small amount of hot glue where the branches overlap, then use a clamp or clothespin to hold them in place while the glue sets. This makes the process much easier (and faster) than trying to hold everything by hand.
- Continue adding branches one at a time, gently bending them into a circular shape as you go. Clip and glue each section before moving on to the next.
- Once your wreath is almost complete, connect the final branch back to the beginning. Adjust the shape as needed—it doesn’t have to be perfect.
- If you have extra branches, weave them into the wreath to fill in gaps or add texture. Let everything dry completely before handling.
This evergreen wreath is more than just a seasonal decoration. It’s a reminder that meaningful activities don’t need to be complicated or expensive. With a few branches and a little creativity, you can turn an afternoon outside into something memorable—and maybe even start a new Earth Day tradition.


If you smell gasoline, your fuel system may be leaking.
While I was serving in the Coast Guard, my vessel was contacted for assistance by a nearby fisherman.
While all of these business logos have been around for
years and everyone knows exactly what business they describe, what about the new business owner.