
DIY Halloween Teacher Gift: A Bucket of Goodies


Teachers do so much — from helping our kids learn to keeping them inspired day after day. With Halloween rolling in, it’s the perfect time to surprise them with something sweet (and maybe a little sparkly!).
This DIY Halloween Teacher Gift: Halloween Bucket of Goodies is an easy, budget-friendly craft that looks adorable on a teacher’s desk and spreads a little seasonal joy.

Whether you’re a room parent organizing classroom gifts or just want to send a little something special from your child, this idea is simple, customizable, and full of personality.
Be sure to check out some of these other great Fun and Easy Halloween Crafts for more fun ideas!
What You’ll Need
Before you get started, gather a few fun supplies:
- Small Halloween-themed bucket or pail (plastic, tin, or reusable)
- Tissue paper or shredded paper filler
- Halloween stickers, ribbon, or mini decorations
- Construction paper
- Glue and glitter (Elmer’s works perfectly!)
- Tags or printable labels
- A mix of goodies to fill it with — see ideas below!
Pro Tip: You can find most of these supplies at dollar stores!
This post contains affiliate links, which means I earn a commission when anything is bought. This is at no additional cost to you.
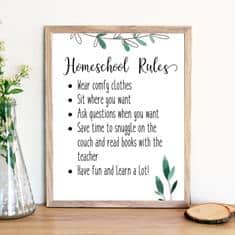
Shop My Homeschool Room:
The following homeschool picks of mine can be found on Etsy or Amazon. Simply click the image that interests you – yes, they do contain affiliate links.


What to Put in the Bucket
This is where the fun really begins! Mix and match a few treats and items that your teacher will actually enjoy.
Candy & Treats:
- Mini chocolate bars or candy corn packets
- Halloween cookies or popcorn balls
- Pumpkin spice tea or cocoa mix
Non-Candy Options:
- Cute pens, pencils, or highlighters
- Sticky notes or small notebooks
- Mini lotion, sanitizer, or lip balm
- Fun erasers or paper clips
- Coffee gift cards
Would you like to save this?
Want to make it extra personal? Add a handwritten thank-you note from your child. Teachers treasure those little messages more than you know!
How to Assemble Your Halloween Bucket
- Prep your bucket: Add some tissue paper or shredded filler to give the base a pop of color.
- Add your goodies: Layer the items inside so they peek out and look festive.
- Decorate the outside: Use glue and glitter, stickers, or washi tape to jazz up the bucket. You can cut strips of construction paper and glue them on the outside of the bucket for a fun look. I did this and just glued down the strips.
- Top it off: Attach a cute tag or note — something like “Thanks for making learning boo-tiful!”
This is a great project to do with kids. They’ll love decorating and choosing what to include, and it’s a fun way to talk about gratitude.


More Ideas for Personal Touches
- Wrap the handle with Halloween ribbon or pipe cleaners.
- Add a small charm or bell for a touch of whimsy.
- Print a Halloween quote or punny message (“You’re spook-tacular!” or “You’ve got great boo-tential!”).
- Coordinate with other parents to make matching gifts for the whole staff.
This gift isn’t just adorable — it’s useful, thoughtful, and made with love. It gives teachers a reason to smile in the middle of a busy season, and it’s proof that small gestures can make a big difference.
More Halloween Resources:
- Find the Letter P is for Pumpkin
- Halloween Sweet Treats
- Dog Costumes for Halloween
- Dental Health During Halloween

Halloween doesn’t have to be all about candy and costumes — it’s also about creativity, community, and connection. And this easy craft celebrates all three!
More Halloween Fun
Here are a few more fun craft and Halloween activities that you can do! You can never have too many ideas!
Fal Printables


Oooh perfect! Nice to think of teachers too!
Thank you for linking to Kids Get Crafty!
Maggy
Love it! Please post this, and anything else you may have,in my link party at
http://diycraftstomake.blogspot.com/
Thanks,
Peggy
I come from a family of teachers and I can say without a doubt-a spa bucket is PERFECT! 🙂
ROTFL, Amy. My husband is also a teacher. I can image that she will really put it to use. 🙂
You can never go wrong with a bucket of goodies! Great idea Kelli!
LOL! Thanks, Amanda!
I think that after all the Halloween excitement at school, the teacher is going to need a spa day! The bucket turned out super cute!
I was kind of thinking that, too! I am really happy with them – and she can use the bucket for so much!
Cute idea! & I love that its like two gifts in one! 😉
Thanks, Theresa!