
Thanks For Helping Us Grow! {Teacher Appreciation}
First day of school! First day of school! The excitement! The joy! The anticipation! The fear! What a bag of mixed emotions on the monumental day. One way to help your child feel better about the big day is to put a little focus on others, namely the teacher!
Recently, we were reading Amelia Bedelia’s First Day of School. At the end of the book, the reader discovers that it is the teacher’s first day of school (as a teacher) as well and she was pretty nervous. What a great way to start a discussion about empathy! After the book, you and your child can make a teacher appreciation gift together.
Here’s one I saw featured in Parents magazine a little while back. You can find the original post here. I scored some flower seeds while standing in line at the zoo the other day (thanks to ), so I decided to use those in my flower instead. If you’re anything like me, drawing identical petals is about as easy as trying to lasso a greased pig, so Kelli was kind enough to draw up a template for me (and you!) to use! Grab your Appreciation Flower Template here and let’s get started!
I did this project on my own, but if you’ve got older kids (mine are still toddlers), they could certainly help with tracing, cutting or gluing!
What You Need:
- Yellow Pattern Scrapbook Paper
- Brown Construction Paper or Cardstock
- Flower Seeds
- Sunflower Sentiments Template
- Popsicle stick or Skewer for stem
- Cellophane
- Scissors, Glue, Pencil
What You Do:

I didn’t have any cellophane, so I used plastic wrap instead. Its not quite as sturdy, but it worked okay. Wax paper might also be an option, though you wouldn’t be able to see the seeds as clearly. Now to get cutting and tracing!
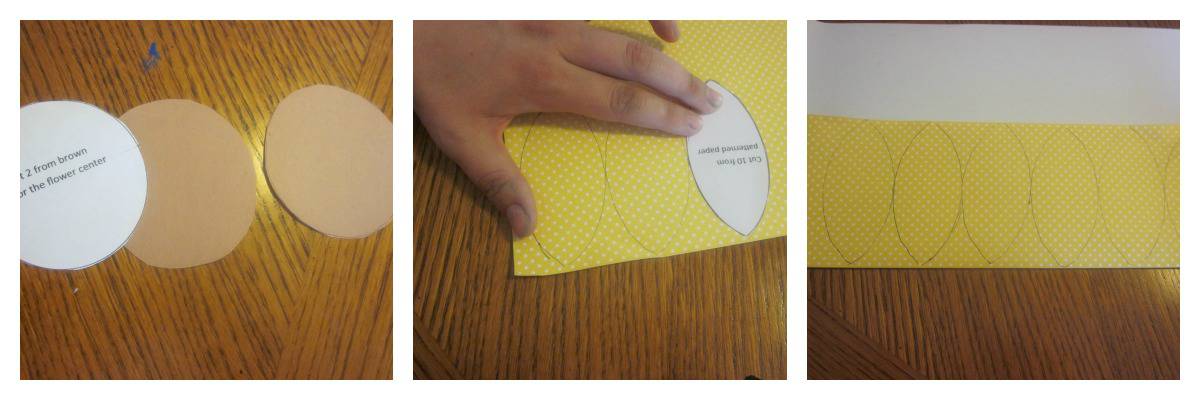
For the petals, I got 6 across one sheet of scrapbook paper. I folded the paper up so I could cut out two sets at once. Now I’ve got two extra petals in case I mess up!
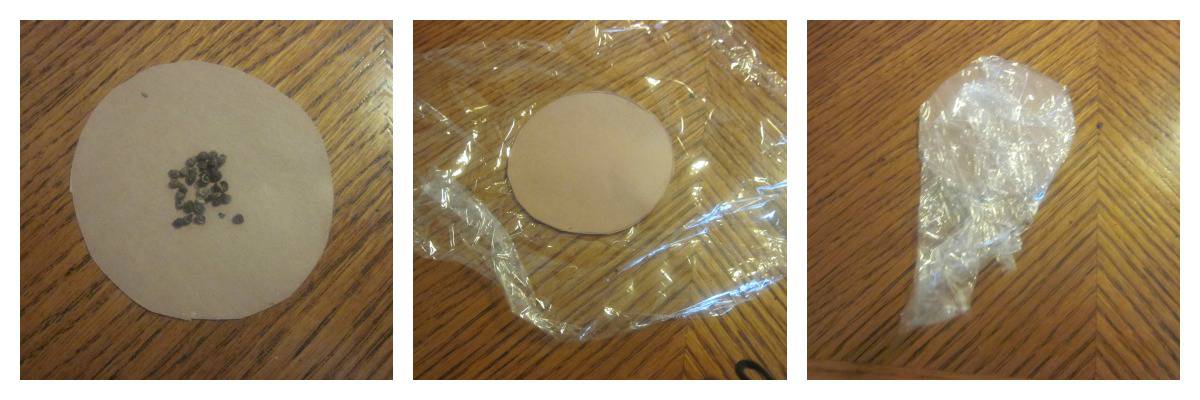
Okay, put a few seeds in the center of a brown circle and then wrap in plastic wrap/cellophane. I covered the top and then carefully and quickly flipped the whole thing over to wrap up the back real tight.
Would you like to save this?
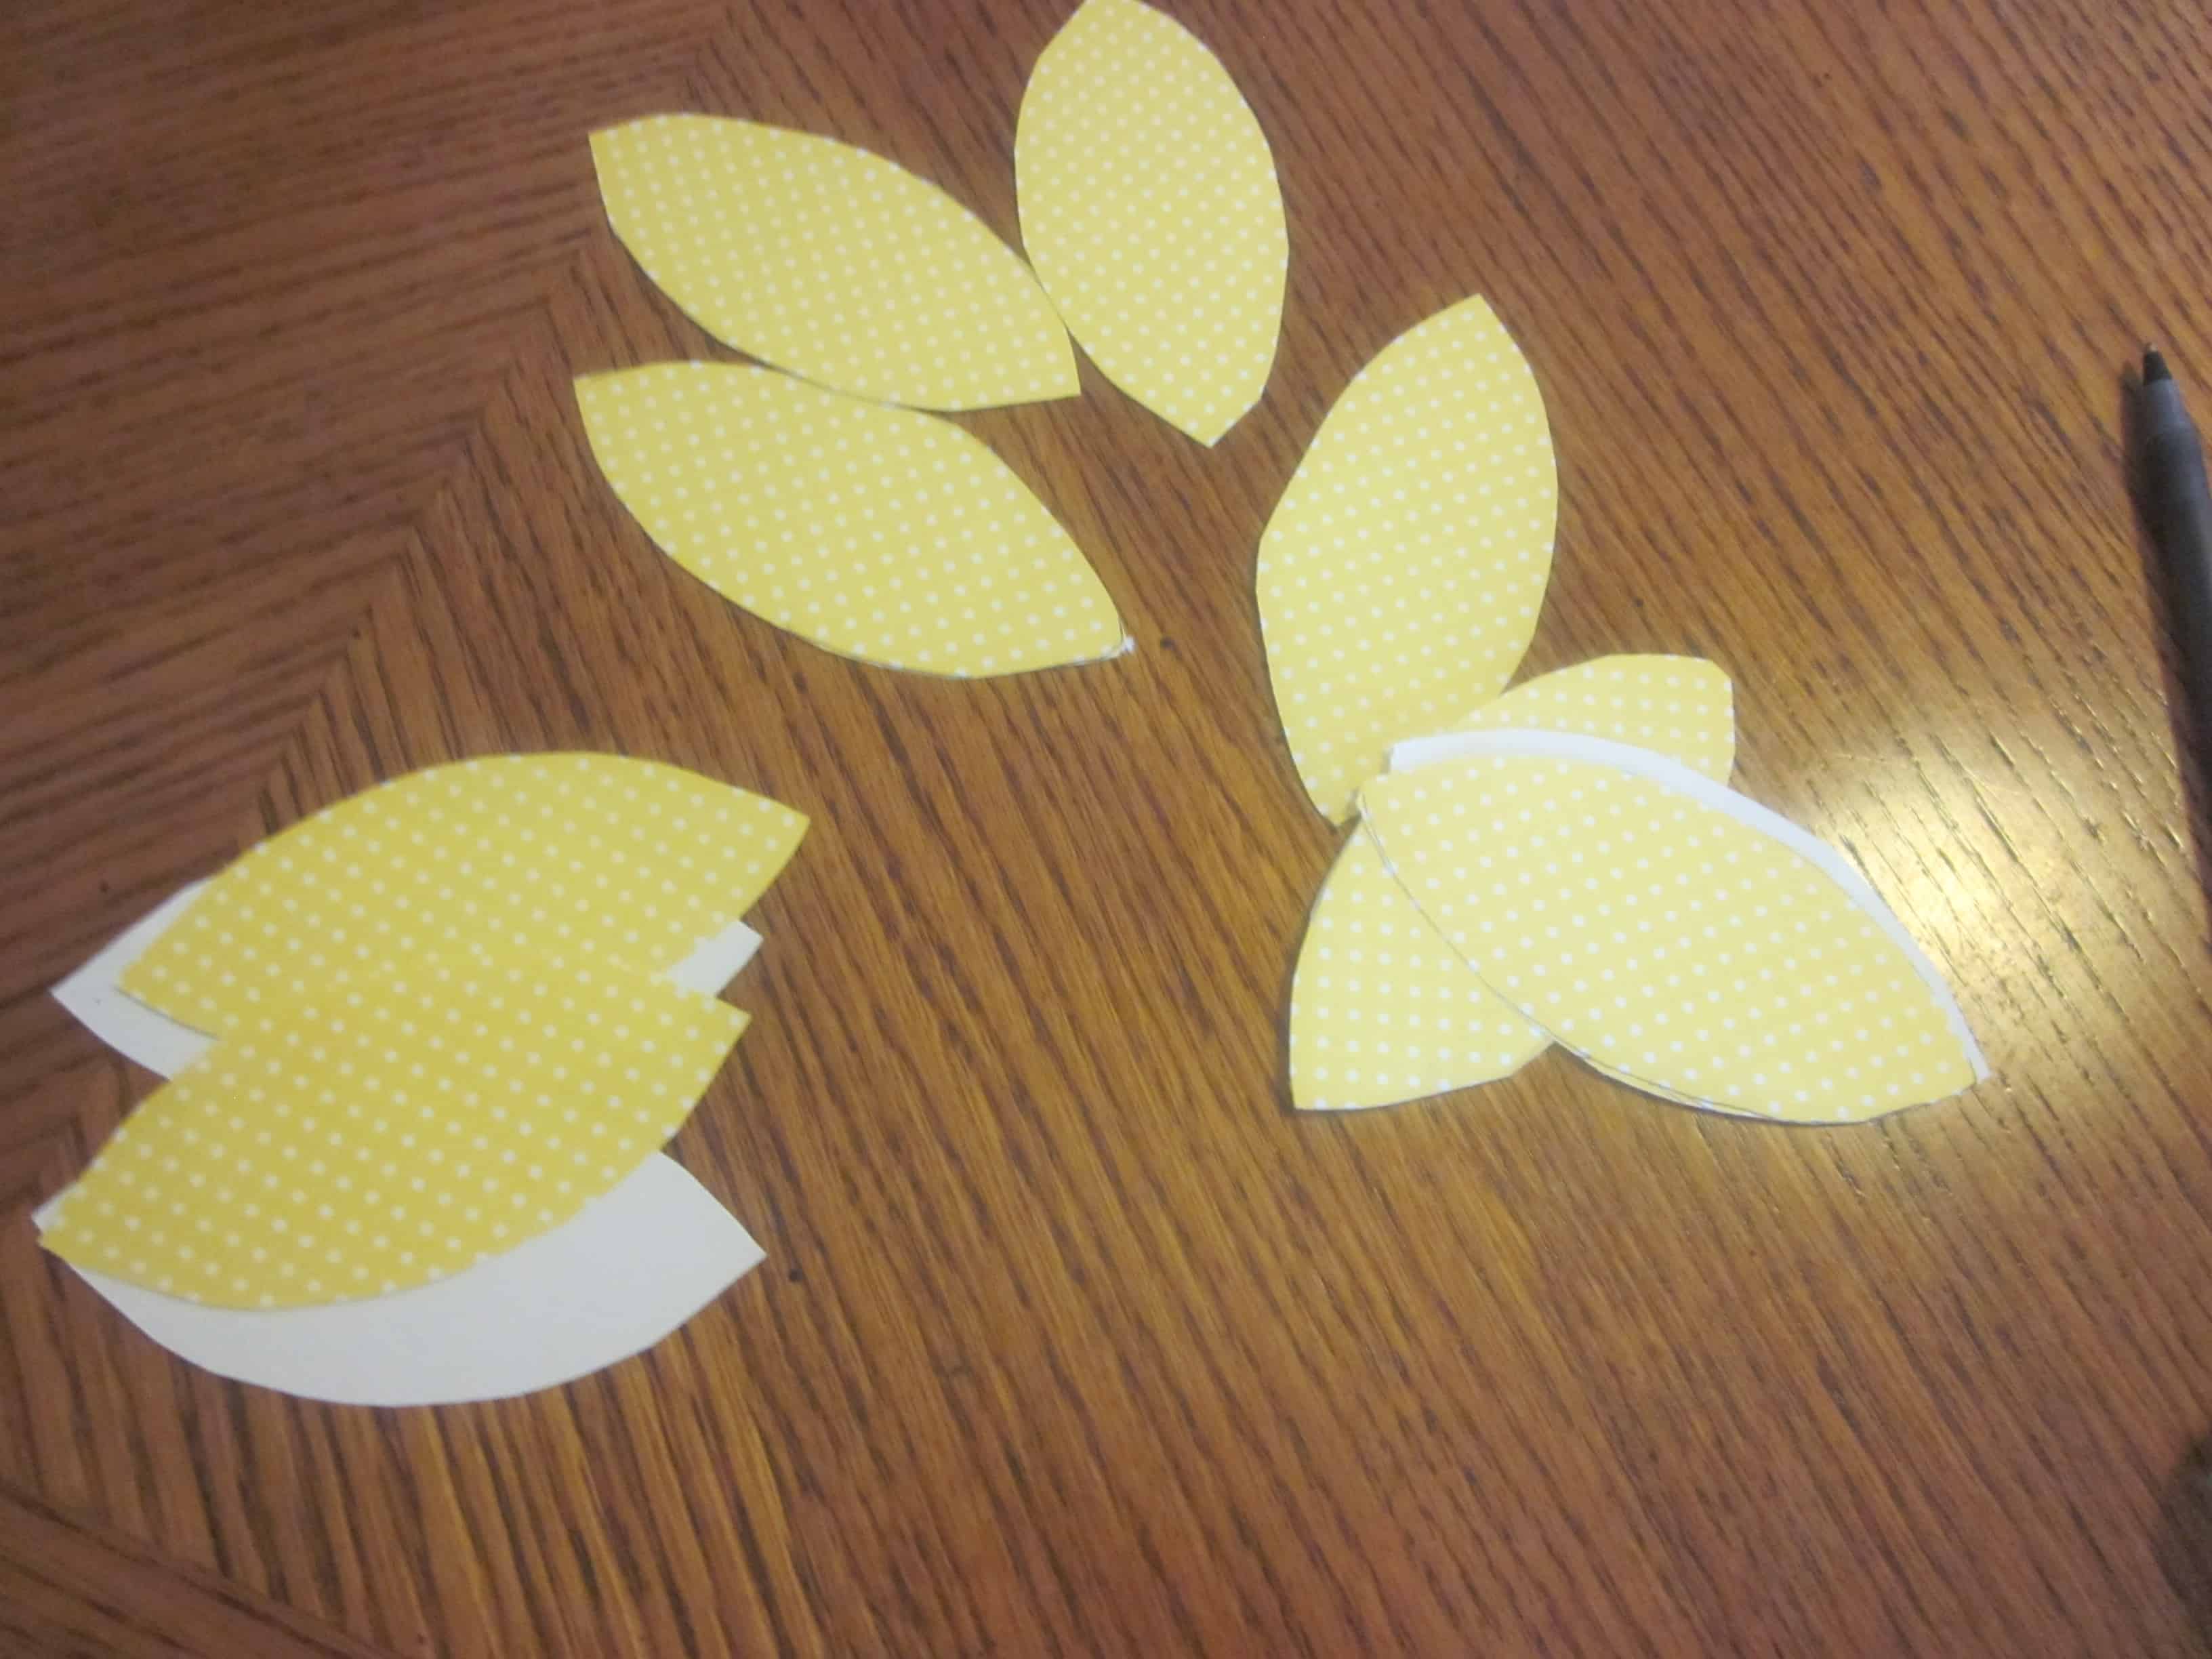
Glue petals all around the outside of the bottom brown circle (the one with the seeds on it). You could probably use a glue stick for this, but I had my glue gun ready, so away we went! As you can see, I am pretty terrible at angles and spacing, but you’ll cover up the middle with another brown ring, so no worries!

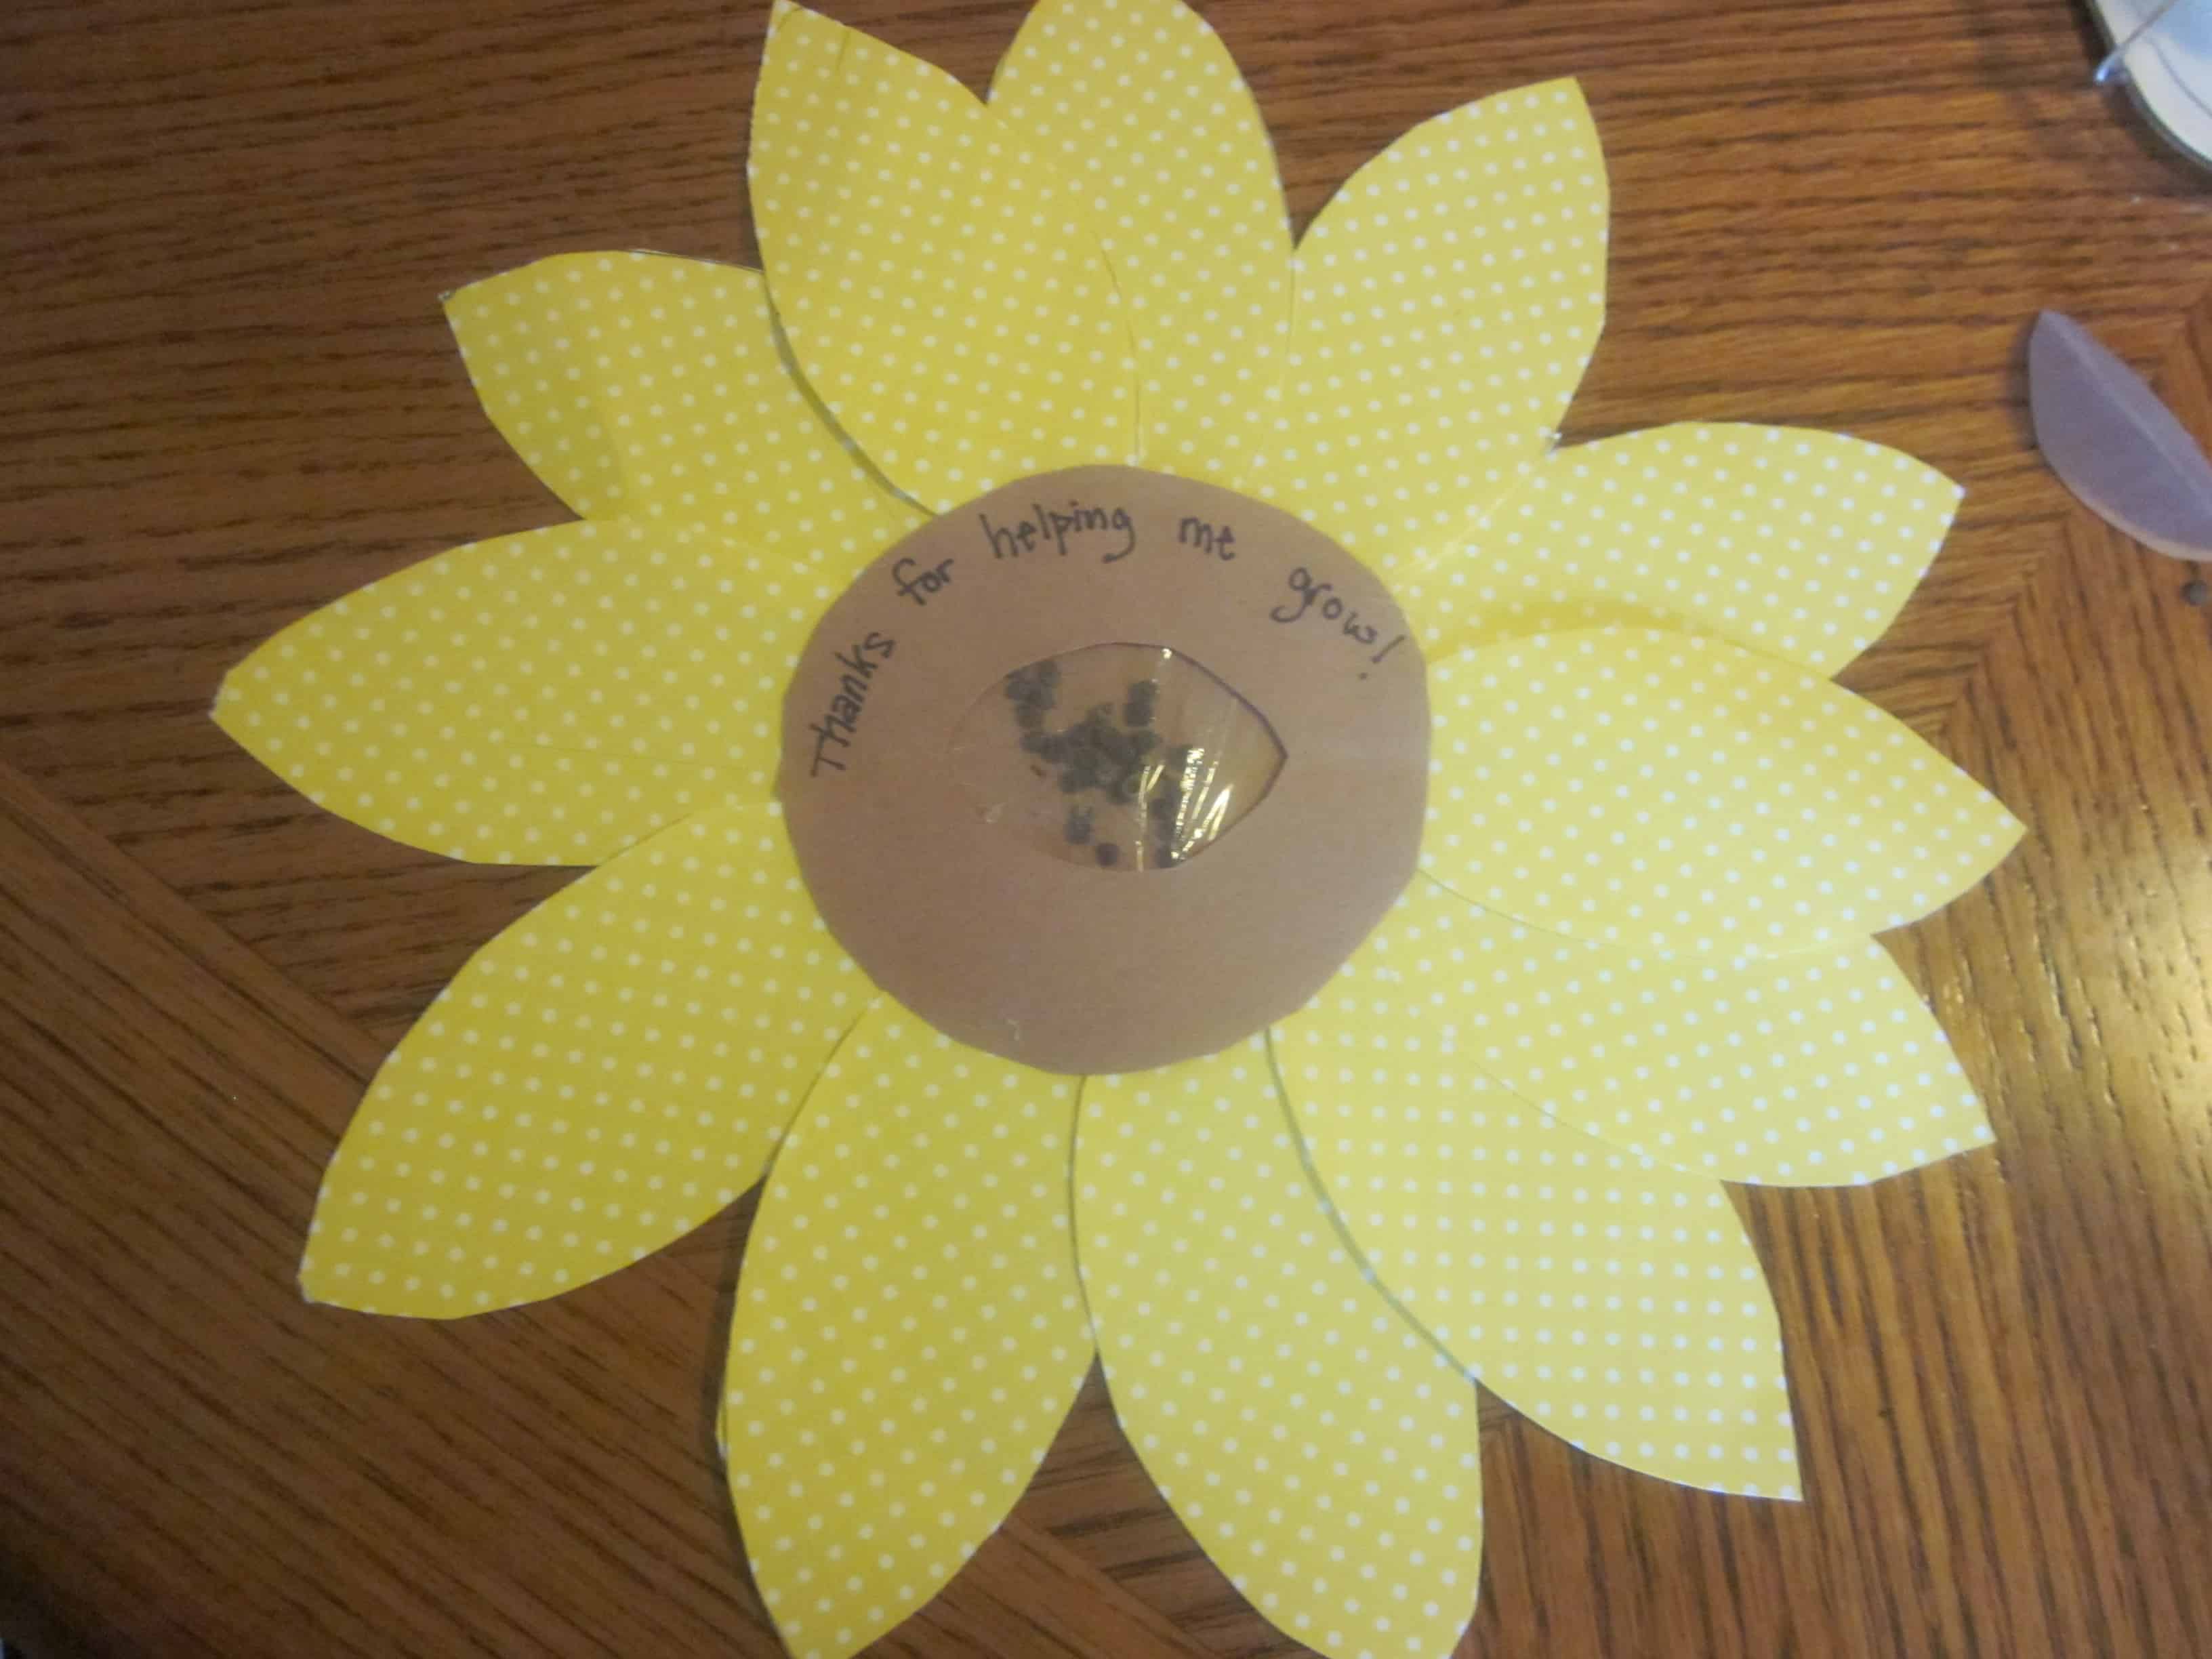
Once the petals are in place, glue the brown ring in the center. Originally, I tried to “freehand” cutting out the middle. Disaster. One attempt #2, I folded the circle in half and drew a semi-circle to cut out. You could take a metallic gel pen and write a nice “Thanks for Helping Us Grow” message around the ring if you’d like. Now that’s a nice looking flower!!
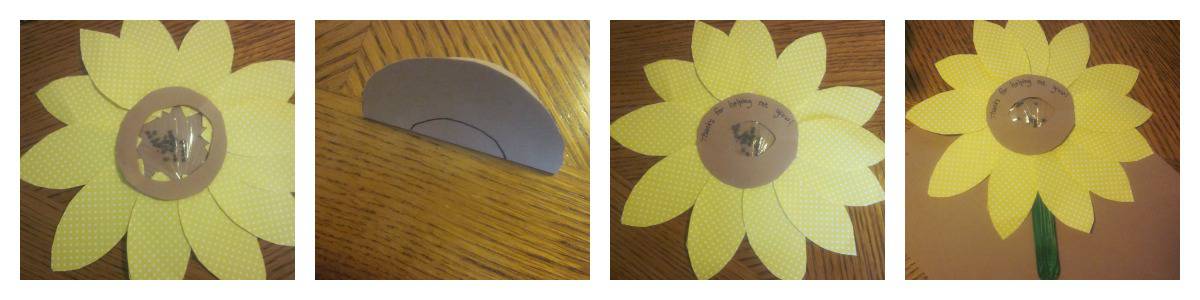
Glue a Popsicle stick or skewer on the back for a stem. I painted mine green for extra effect, but that’s optional! Around here, we’ll take almost any excuse to get the paints out!
Stay tuned tomorrow for another flower-themed Teacher Appreciation project!
About the Author
Lindsey Whitney is a mom of two, home day care provider, and blogger over at Growing Kids Ministry. Growing Kids Ministry is a blog designed to help parents, teachers, and Children’s Ministry workers who want to help the kids they love grow in their faith. You can connect with her via twitter or on facebook!


