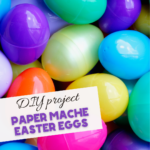
DIY Paper Mache Easter Eggs
These DIY Paper Mache Easter Eggs are perfect for Easter fun!
Ingredients
- Plastic easter eggs
- Paper
- Crayons
- White school glue
Instructions
- Start with plain drawing paper and let kids go all in with coloring. The more color and pattern, the better the final eggs will look.
- Tear the paper into strips and small pieces. Thinner pieces are easier to work with and help create a smoother finish.
- Pour white school glue onto a plate or a piece of wax paper. You can thin it slightly with water if needed, but it works just fine as is.
- Cover your work surface before starting. This part gets messy quickly. Keep damp paper towels nearby for sticky fingers.
- Drag each strip through the glue, then wipe off the excess with your fingers. Wrap the strip around the plastic egg in different directions to cover it fully.
- Keep adding strips until the entire egg is covered. A couple of layers will make it stronger and more durable.
- Set the eggs aside to dry completely. Depending on how thick the layers are, this can take several hours or overnight.
